Jump to Steps:
Step 1: Writing down my story in points
Step 2: Decide the mode of gameplay
Step 3: Pin down the maps and key characters for the campaign
Step 4: Creating the artworks using gen A.I and Map generators
Step 5: Naming my key characters
Step 6: Tinker with the enemy token mechanics of Roll20
Step 7: Create custom characters like my custom boss for the dungeon and the Maiden NPC
Step 8: Type out the GM notes for my story, enemy drops and dungeon loot
Step 9: Explore the Jukebox in Roll20 to add music
Step 10: Practice Reveal Mask, FX and Measure Tool to create an immersive experience for Players
I sat glued to my sofa, staring at the checkout screen, deciding if I should buy Baldur’s Gate 3 (bg3) when it was on sale early 2026. I was really late into the Baldur’s Gate 3 fray, but I wanted something fun to last me for days. DAYS! Maybe MONTHS!
Honestly, I couldn’t bring myself to complete Computer Roleplaying Games. Because I found Disco Elysium having extremely long internal and external dialogues. I was too impatient with the game even go beyond the first part. I’m more of an action gamer. But, I haven’t played a turned-based RPG since my PS 2 days because I skipped Playstation 3 and 4 and went straight to PS 5.
A friend said Baldur’s Gate 3 allowed a player to do whatever they wanted. Another friend remarked that if I loved the Weird West, I should play Baldur’s Gate 3. With what they said combined with the fact that Baldur’s Gate 3 was a turn-based RPG were green lights for me. After staring at my PS Store checkout cart for days, I finally bought it.
Needless to say, I was addicted. And the more addicted I was to BG3, the more I found myself wanting to create my own Dungeons & Dragons (DnD) adventure because BG3 was built on the DnD system of play. So after over 90 hours of playing Baldur’s Gate 3, I began my journey to develop my first DnD campaign.
Here’s how I did it:
Step 1: Writing down my story in points
I thought, what if a Maiden had a nightmare of a Goblin’s silhouette staring at her from over the hills? Although, I can’t remember how and when the amalgamation of ideas in my brain conceived of such a story. Be it in the showers or just taking a stroll, I knew I wanted to build on it.
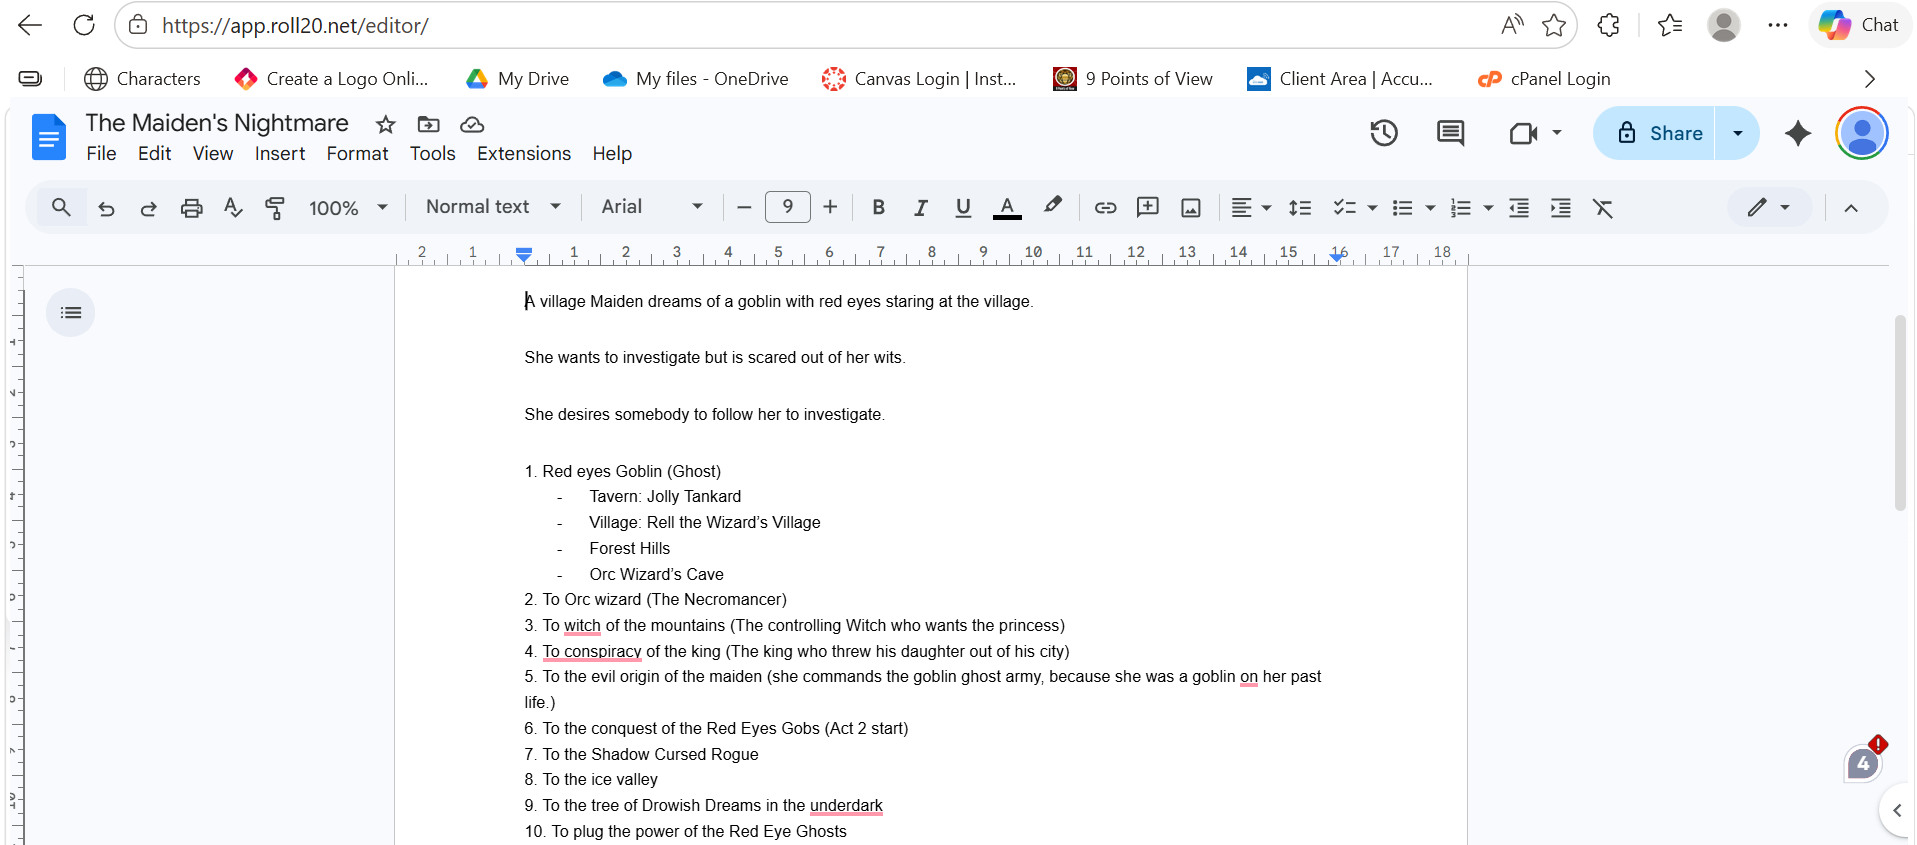
I whipped out Google Sheets to jot down everything that came to mind. Then I just focused on the outline of the very first campaign I wanted to do.
Just like how movies are made out of a simple script, I recommend jotting down your ideas on paper for reference later when bringing your amazing campaign to life!
Step 2: Decide the mode of gameplay
This step should be labelled as Step 0 because DnD can be played with just pencils and paper, a few players coming together and a Dungeon Master (DM) willing to narrate. Everything else is in the theater of the mind.
But I chose to do it with Roll20’s VTT so that one day, I could be a good enough DM to charge my players a fee or teach other wannabe DMs how to start bootstrap. Haha, what a dream eh?
Roll20 is a Virtual Table-Top (VTT) system where Tabletop Roleplaying Game (TTRPG) players have access to the most TTRPG to play online via the VTT. Accessing the VTT’s very cool, very advanced mechanics comes at a cost. I’m not that rich, so I wanted to start boostrap.
But I was noob because I bought the pack consisting the DnD’s Guide for DMs, the 2024 Player’s Manual, and the Monster Manual for USD89.90 without realizing that Roll20 made the basic 2014 rules of DnD FREE for anyone wanting to begin, fully loaded with a library of FREE monsters in the System Reference Document (SRD) for play. Silly me.
You can start for free with the 2014 rules.
I have no regrets buying the pack though, because I now have access to the DnD 5E, 2024 version library of updated rules, characters, monsters, spells, weapons and everything else DnD 5E.
(Patting myself on the back.)
THE BEST VIDEO TUTORIAL for creating a full DnD campaign for FREE on Roll20 by Roll20:
If you are starting out as a wannabe DM like me, this video is all you need to learn the basics of Roll20 and starting a campaign for FREE. Priceless in learning the free tools for DMs.
Watch the video above if you want to understand everything in Roll20 for DnD 5E as I won’t go in depth into the controls of Roll20’s VTT. Instead, I’m detailing the process I went through to construct my campaign and I hope this process works for you too when creating your campaign.
For other VTTs available besides Roll20, I recommend this video by Power Word Spill, as he painstakingly paid for the various VTT options out there to find what was best for his DnD group.
Step 3: Pin down the maps and key characters for the campaign
Now that I have my first campaign fleshed out on paper in point form, the next step planning out the maps and key characters I needed before I moved on to generate the relevant art needed for my Roll20 game.
Maps/Location scenes I needed were:
- The Jolly Tavern
- Inside the tavern
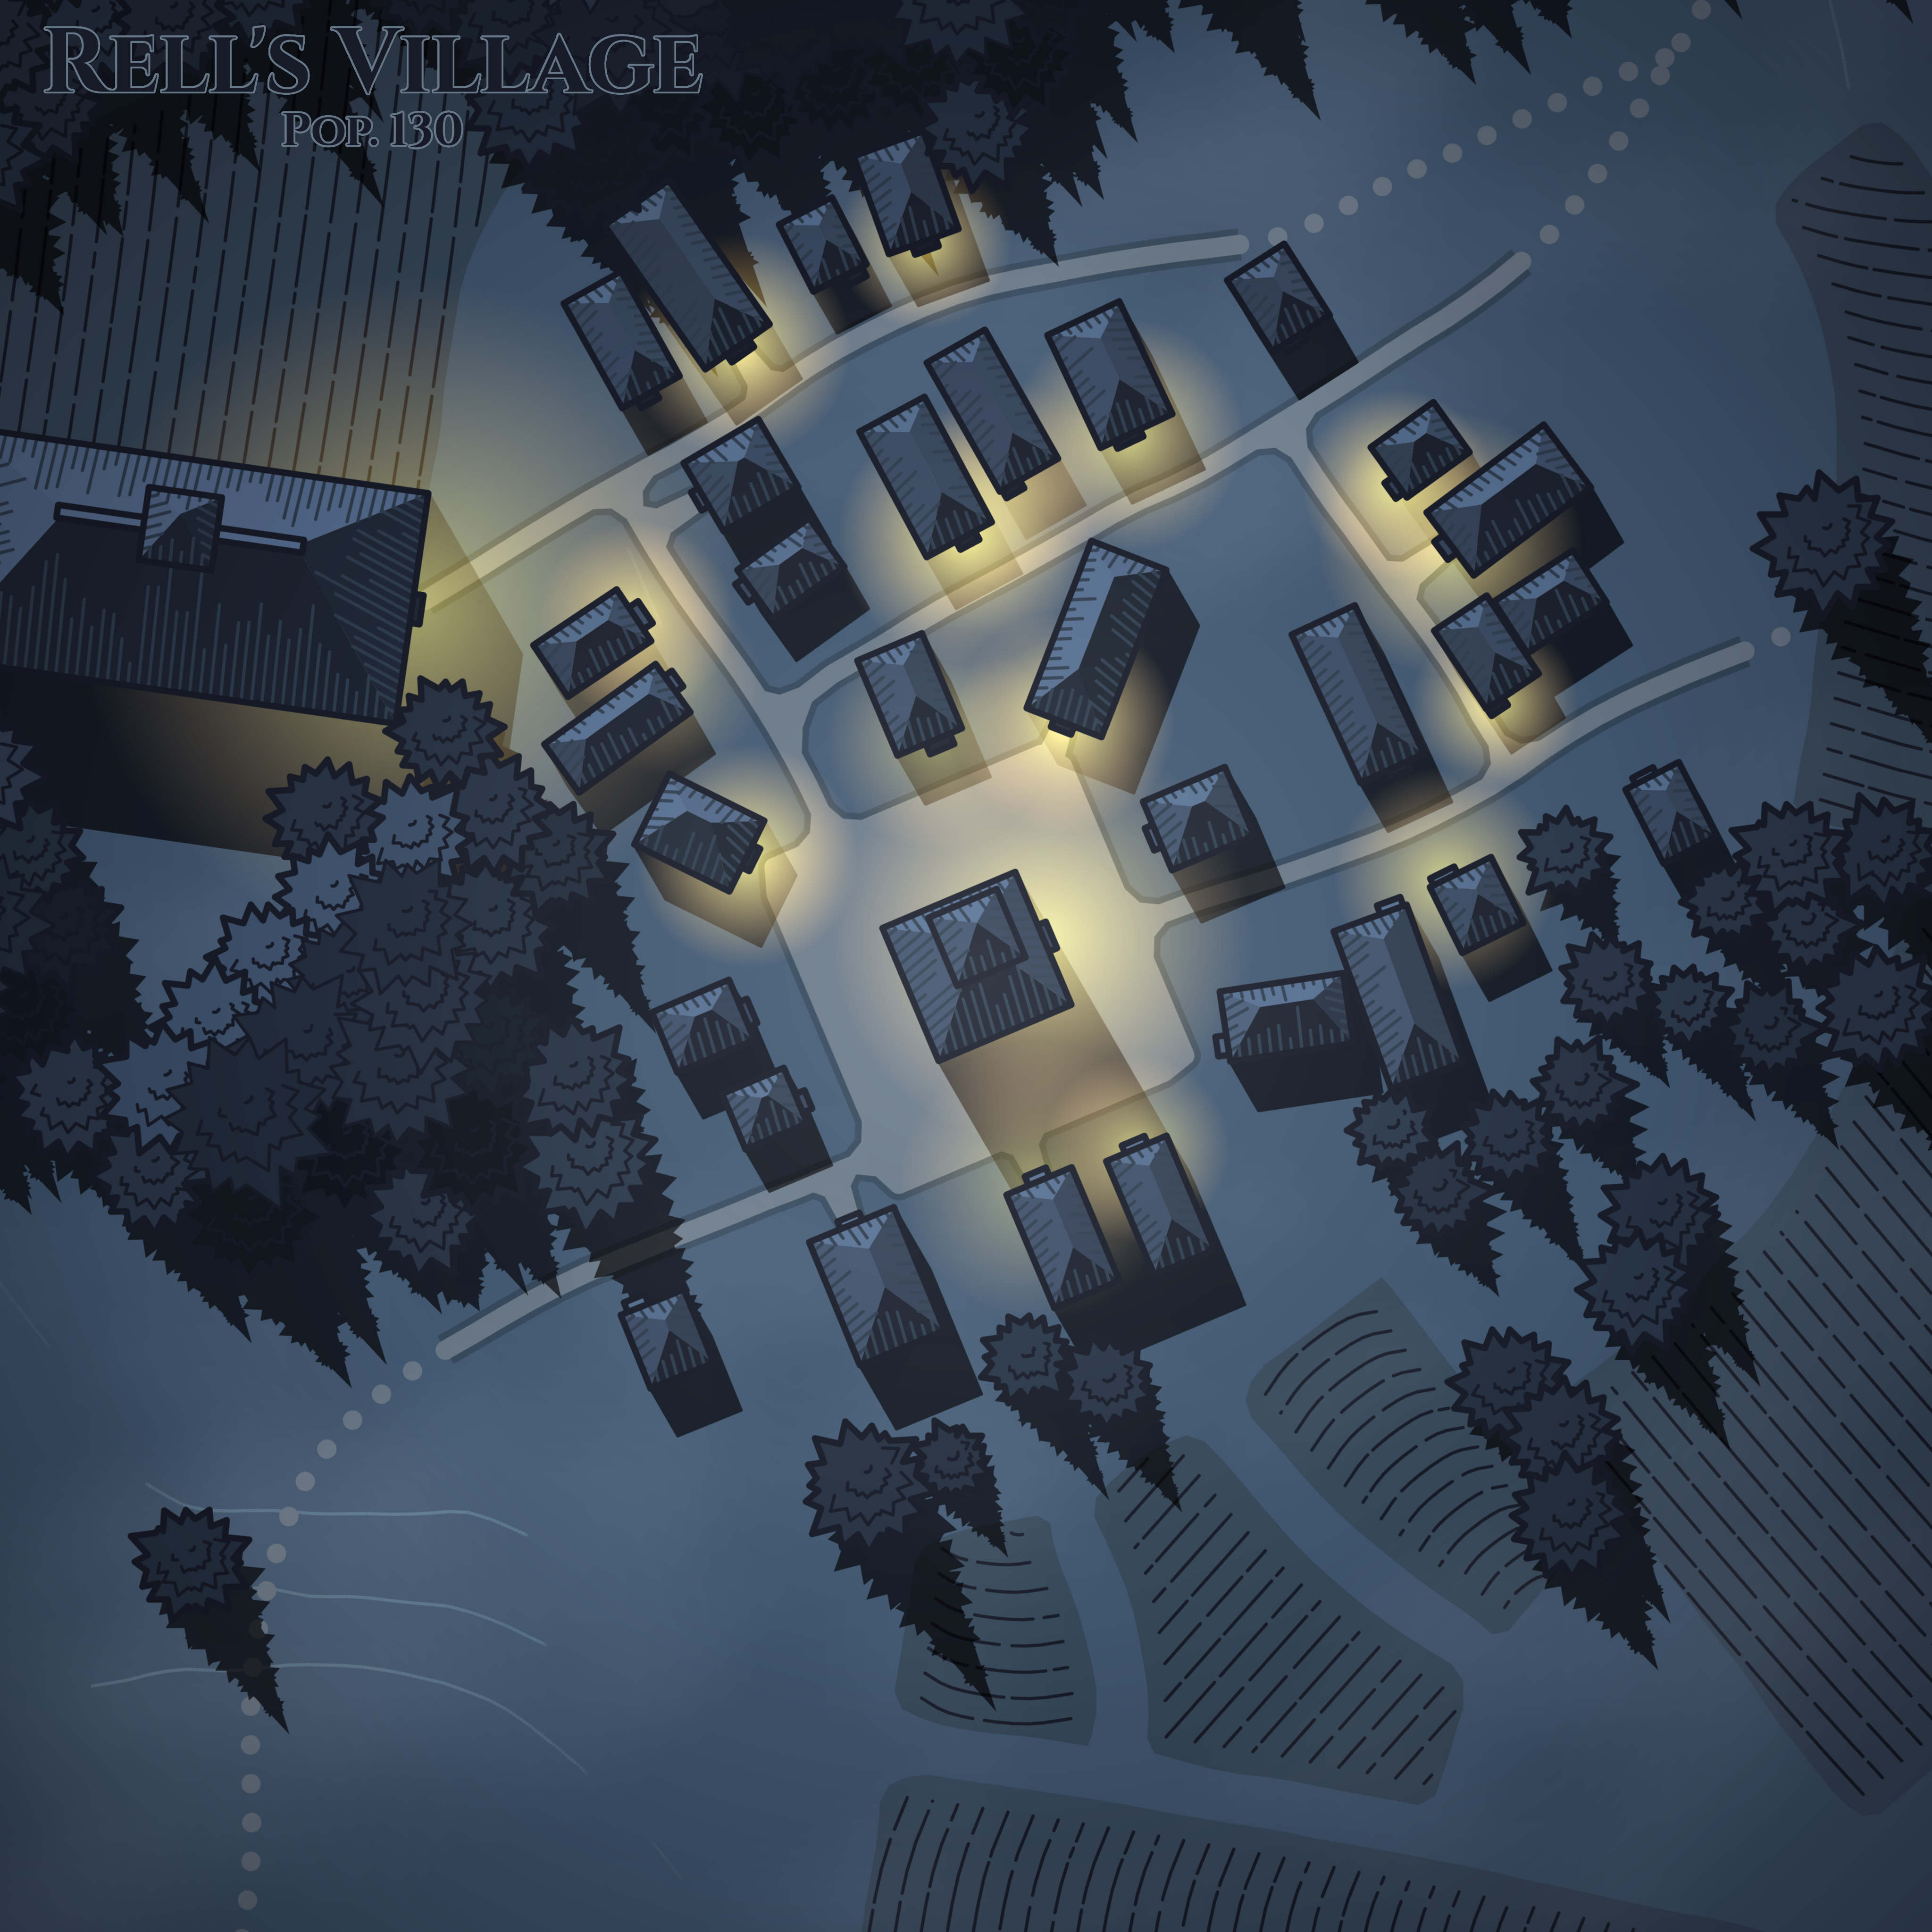
- Map of Rell’s Village
- Forest leading to a hill outside of the village
- The mouth of the cave the adventurers will be journeying into located behind the hills
- Map of the dungeon inside the cave
Initial characters I wanted were:
- The Maiden as the NPC
- A wizard orc boss inspired by Thrall the Shaman Orc from Hearthstone
- Silhouette of the Red Eye Goblin on top of the hill from the Maiden’s dreams
From the looks of it, I was going to slog for hours creating the art for my game.
Step 4: Creating the artworks using gen A.I and Map generators
I’m no artist and I don’t have the bloody time to create any art from scratch.
I dabbled with Dungeon Scrawl as recommended on the Roll20 tutorial video, but I didn’t want to waste precious time designing art for locations. I wanted to focus on creating my story, and less on designing.
Therefore, I did what everyone else would have done. Turn to gen A.I and search the web for random map generators for Roll20. And lo’ and behold, there were an abundance of options available.
I’m not listing all the options I tinkered with but I’ll share the solutions I used to create the assets for my campaign in this post.
Using Perchance A.I to create the art
WARNING, THIS GEN A.I IS NOT FOR TEENS OR KIDS because it is highly unethical and has the ability to produce highly explicit sexual images without restraint. Please use this Gen A.I responsibly as an adult.
Perchance A.I text-to-image generator is by far my favorite because there are no limitations to the number of images a user can generate and furthermore, there are no restrictions for licensed images or the kind of art you want. Even NSFW art. I don’t recommend it for kids but that’s beside the point.
Bottomline is, I’m not an artist. So, if I needed beautiful professional art rendered quickly, Perchance A.I was my solution.
These were the artworks I picked from the many, MANY iterations generated with Perchance A.I:
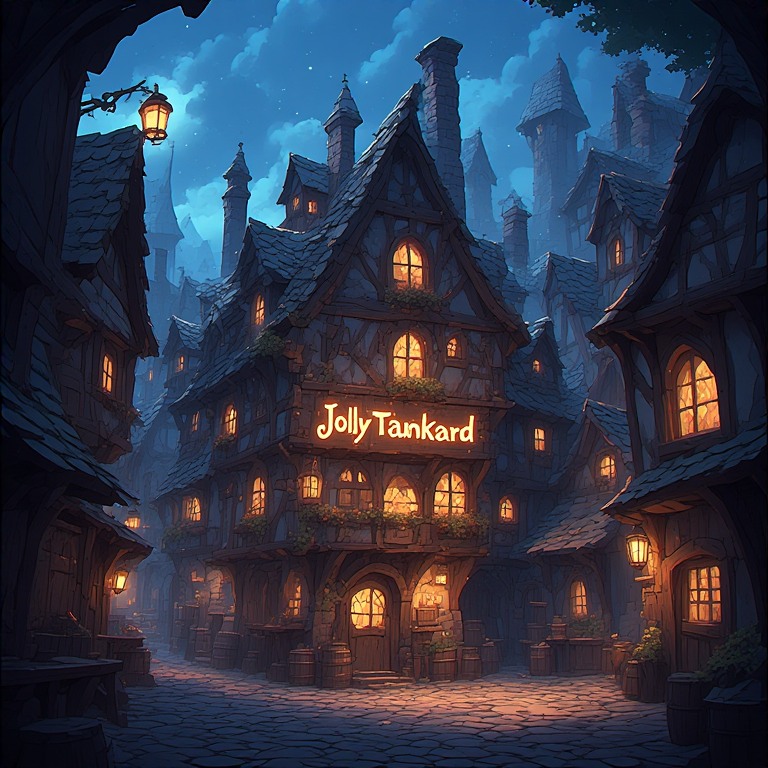
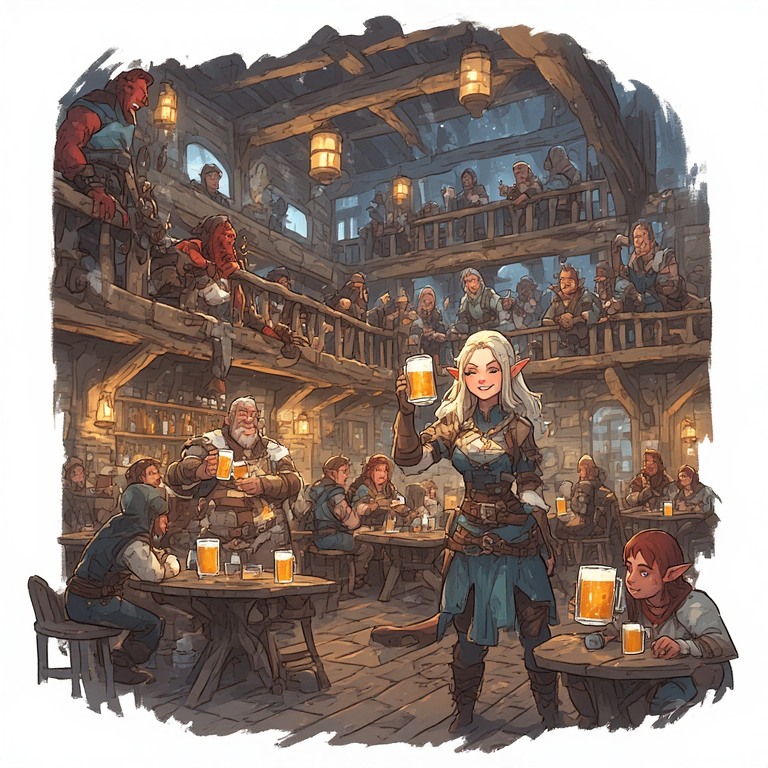
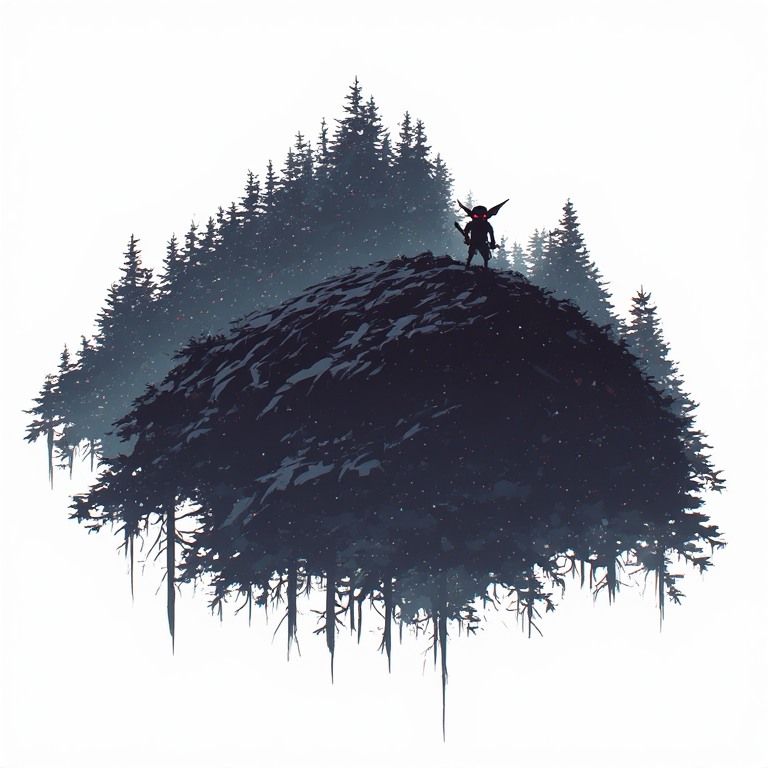
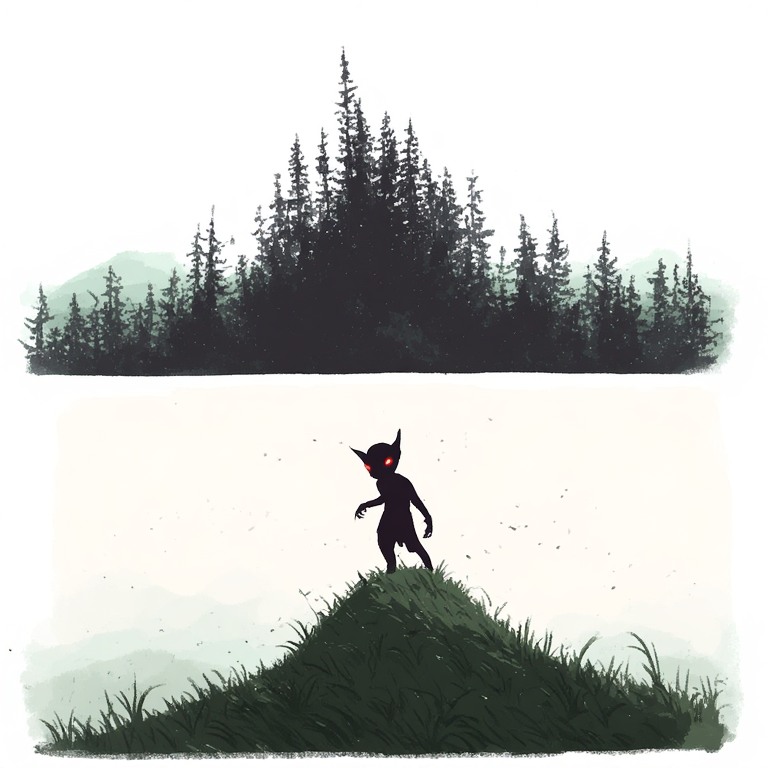
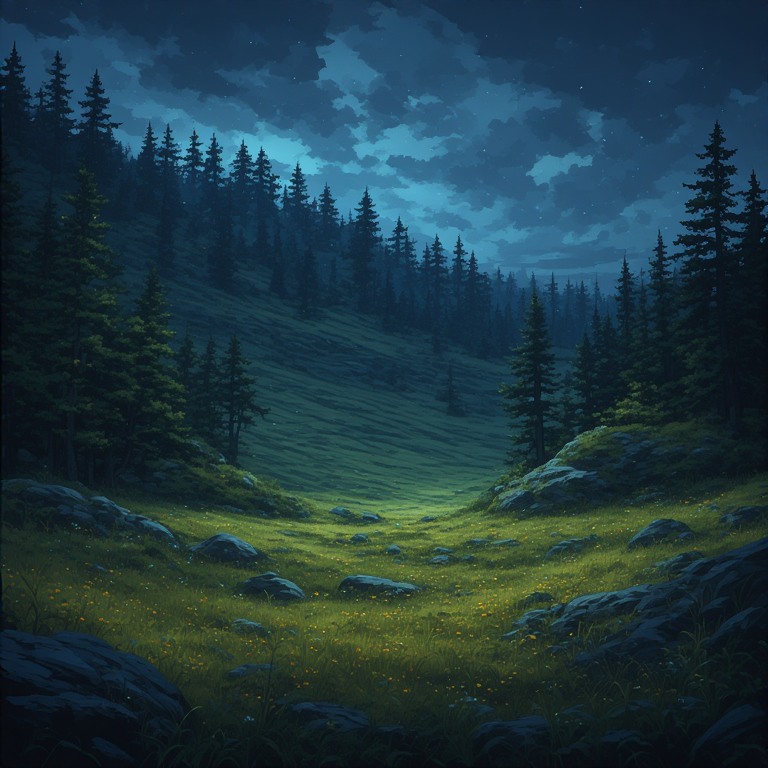
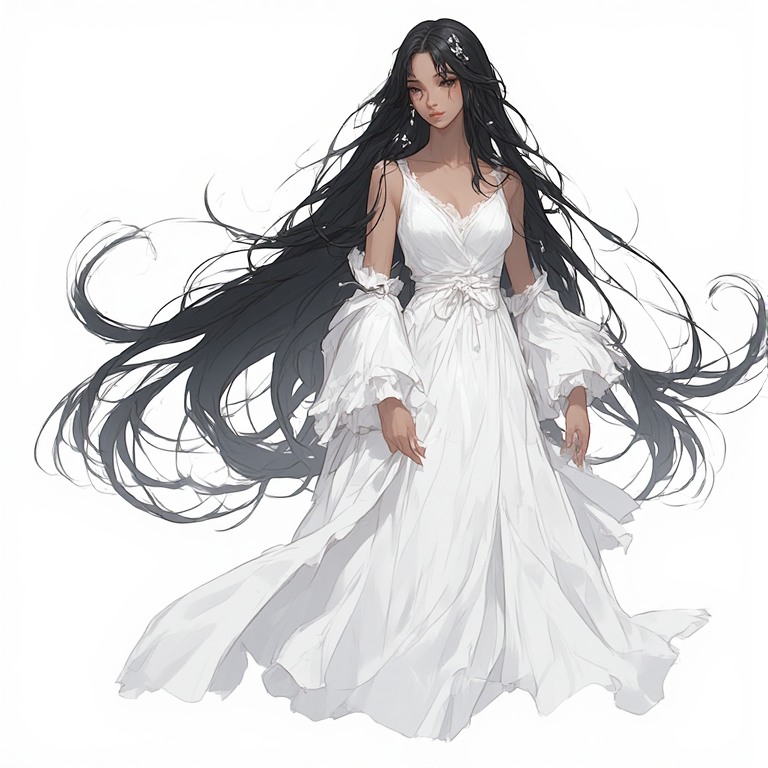
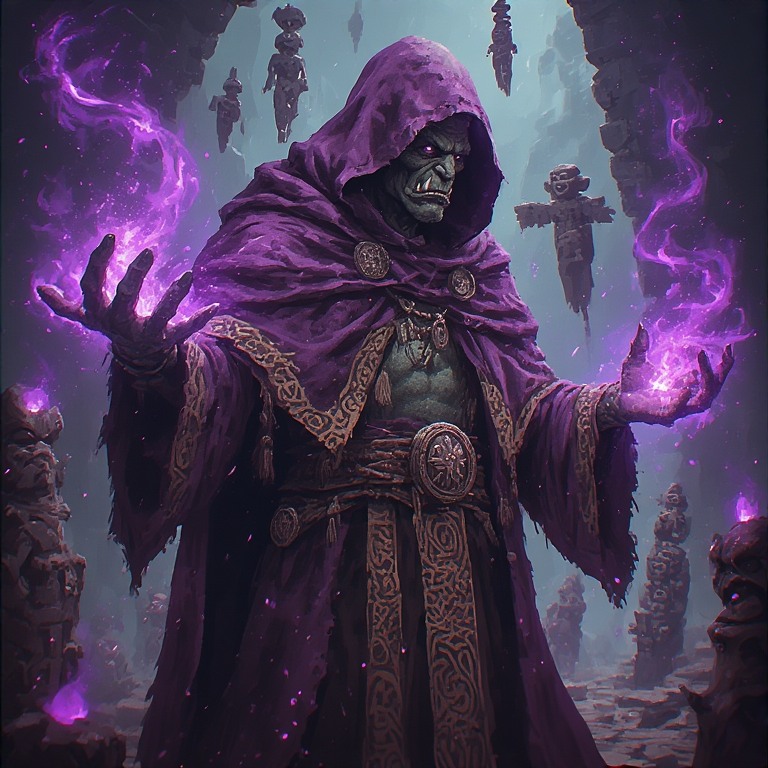
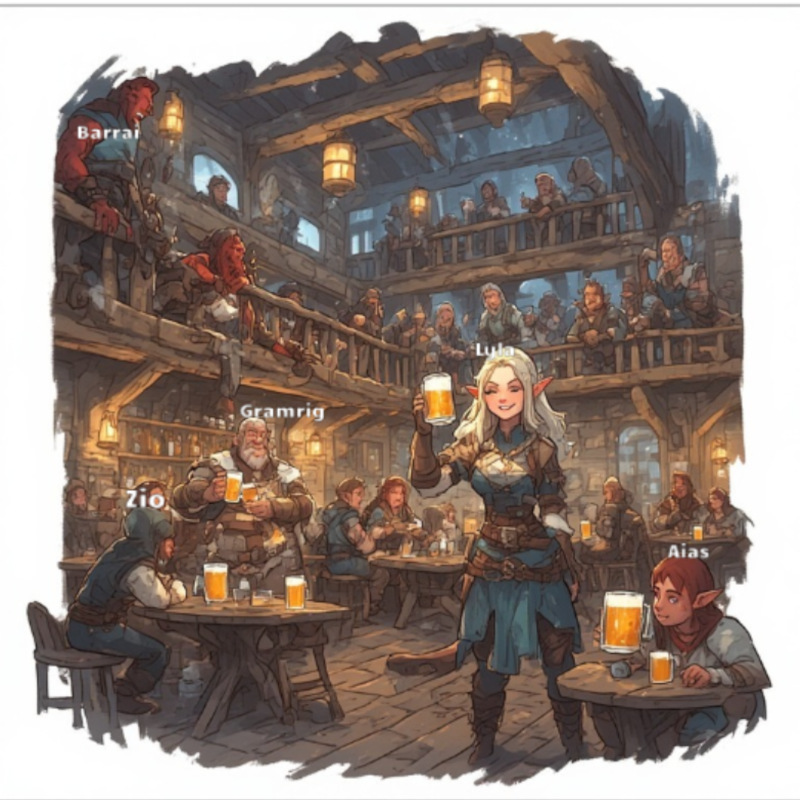
I wanted to tell a story with the theater of the mind using scenes instead of using a lot of maps.
For example, I wanted my players to see the hostess, and the jolly patrons inside the tavern while I narrate the scene. They would then role-play according to what they saw. This allows me to also add personalities to the characters inside the tavern. Making these characters a reality to the players.
Watabou for generating village
At first, I had some trouble with watabou.itch.io/village-generator because it’s not much of a WYSIWYG. Enter the site, choose your desired type of map and poof it generated an image for you. At first, you will find no tools whatsoever shown on screen to tweak the image to my liking.
Fear not, the tools appear after a right-click.
I would have mega-flared the random generated village to smithereens if I hadn’t learned about the right-click.
With watabou.itch.io/village-generator, I found a layout I liked for Rell’s Village after tinkering with the tool:
Watabou to generate interior layouts of dwellings
Now, what if my players wanted to lockpick homes instead of the main mission that I planned?
That’s why I used watabou.itch.io/dwellings to generate the interior of homes for players to break into:
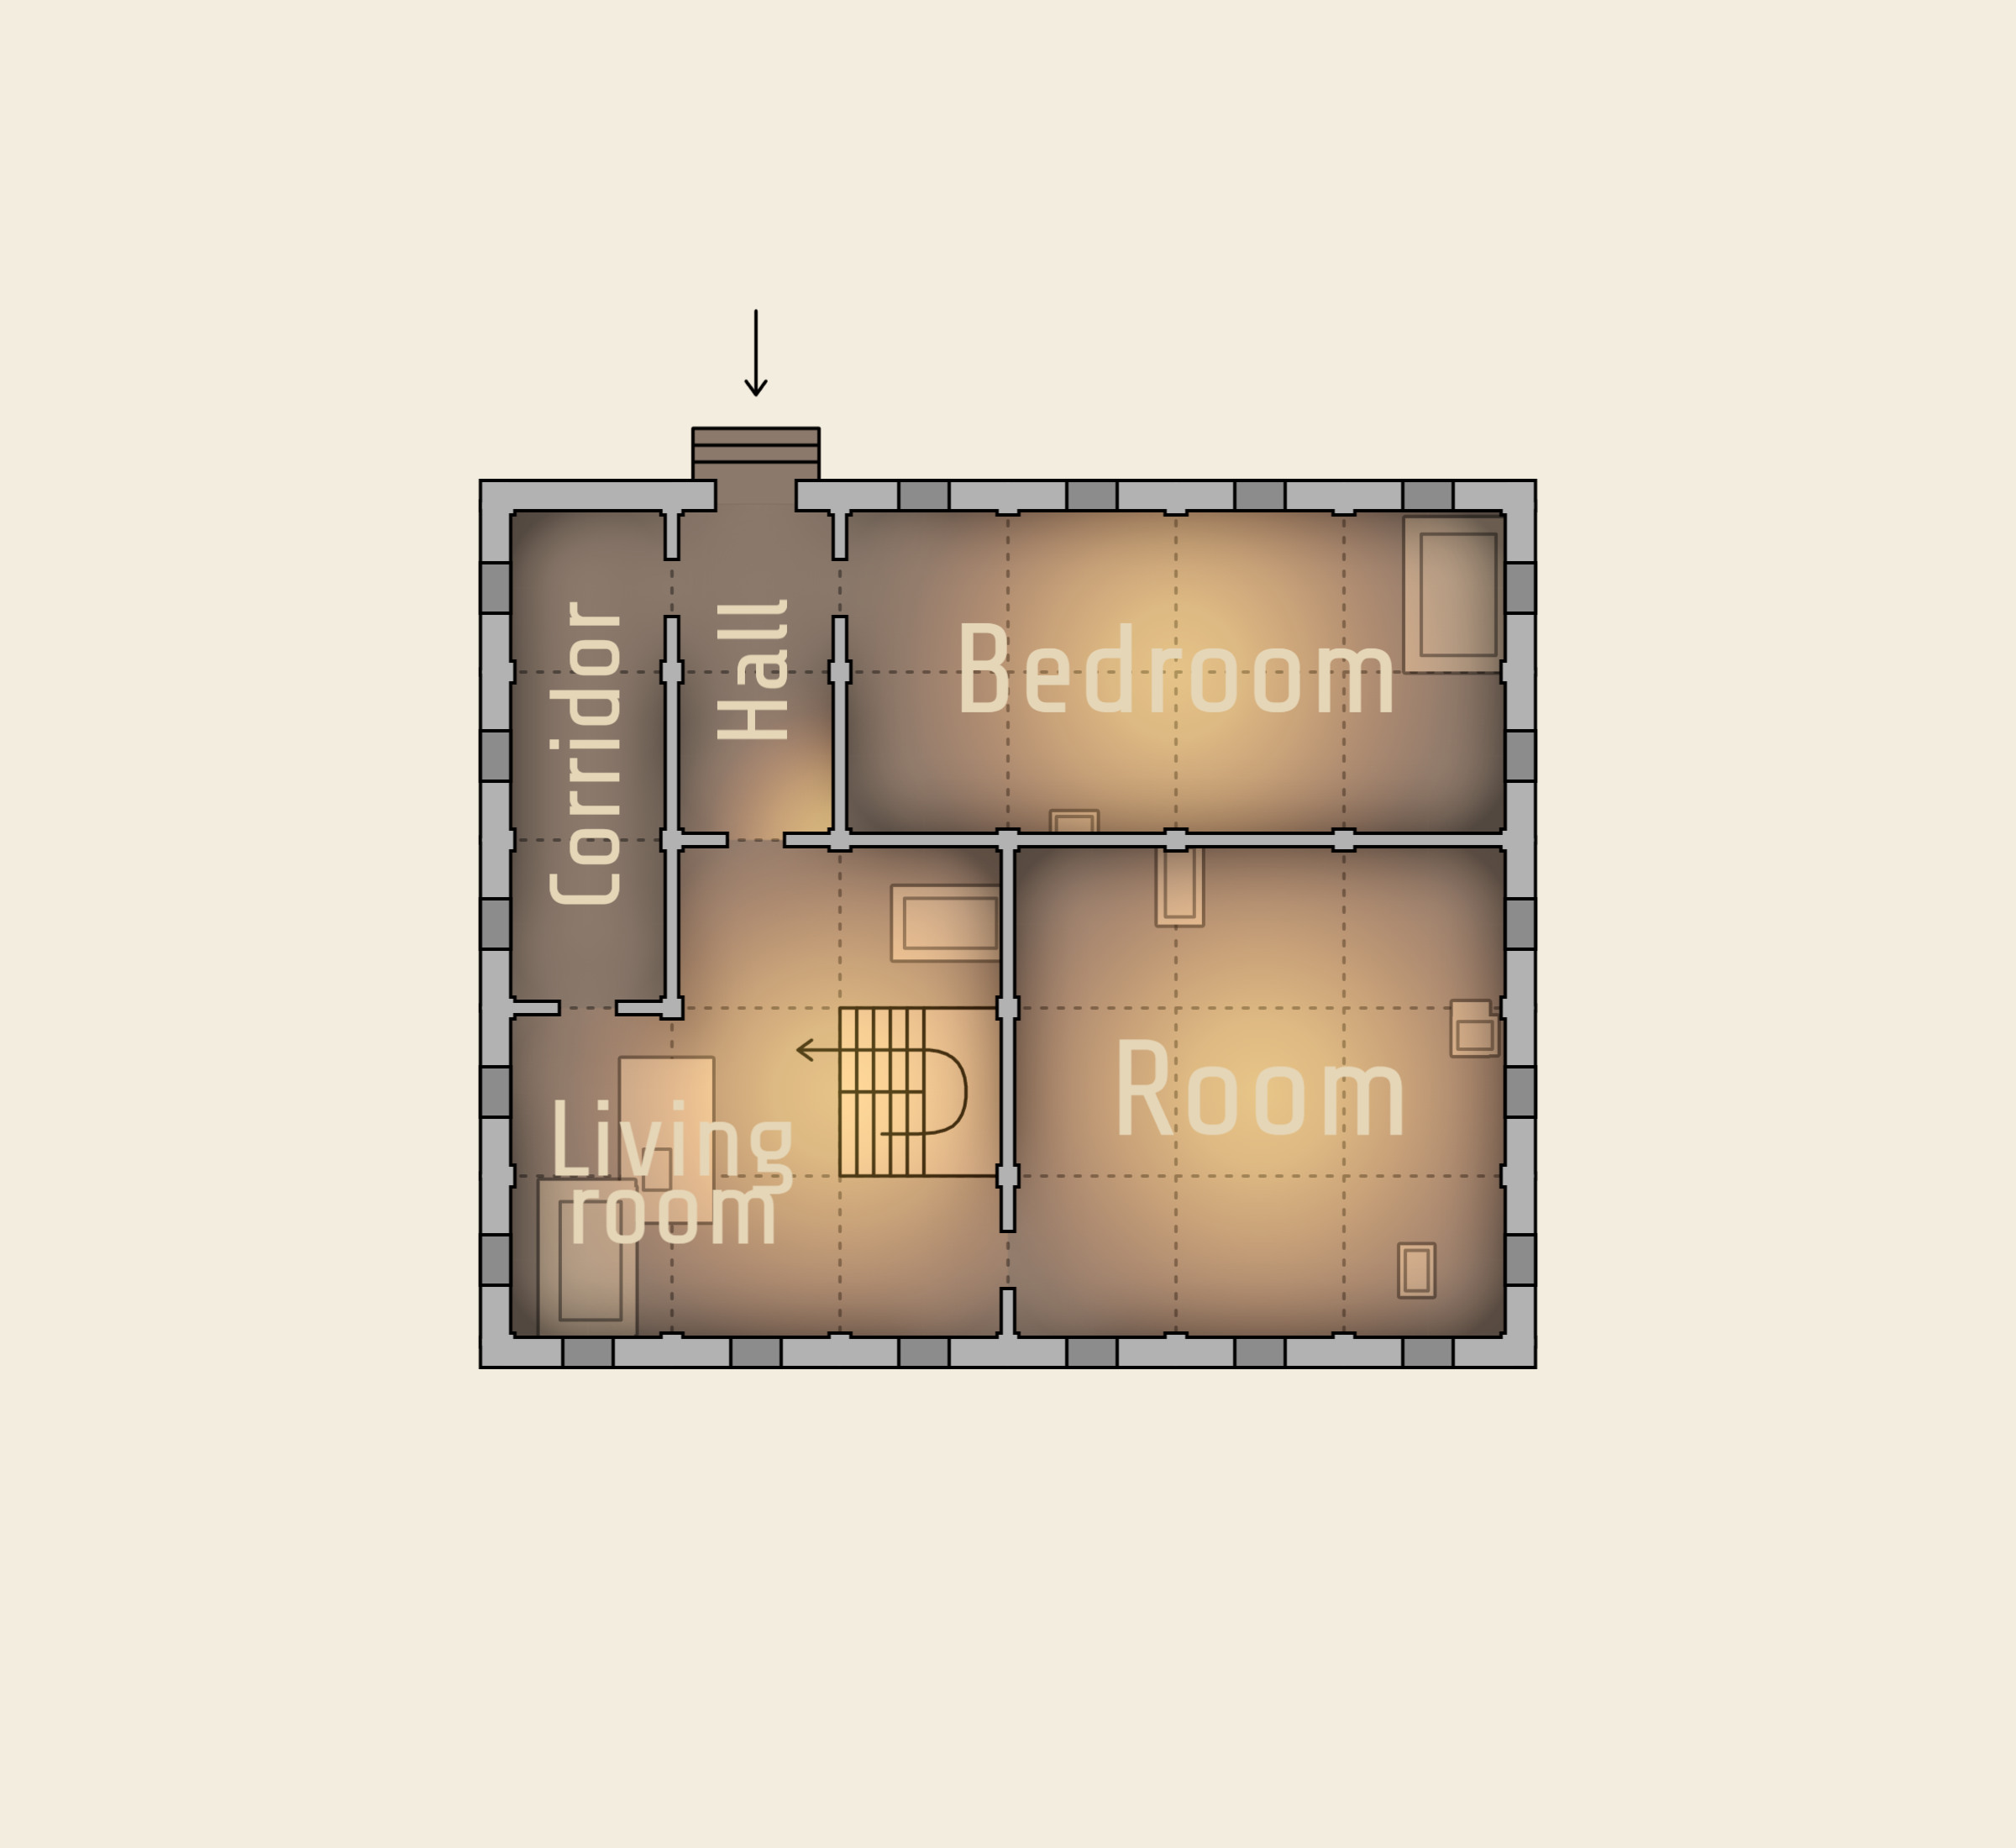
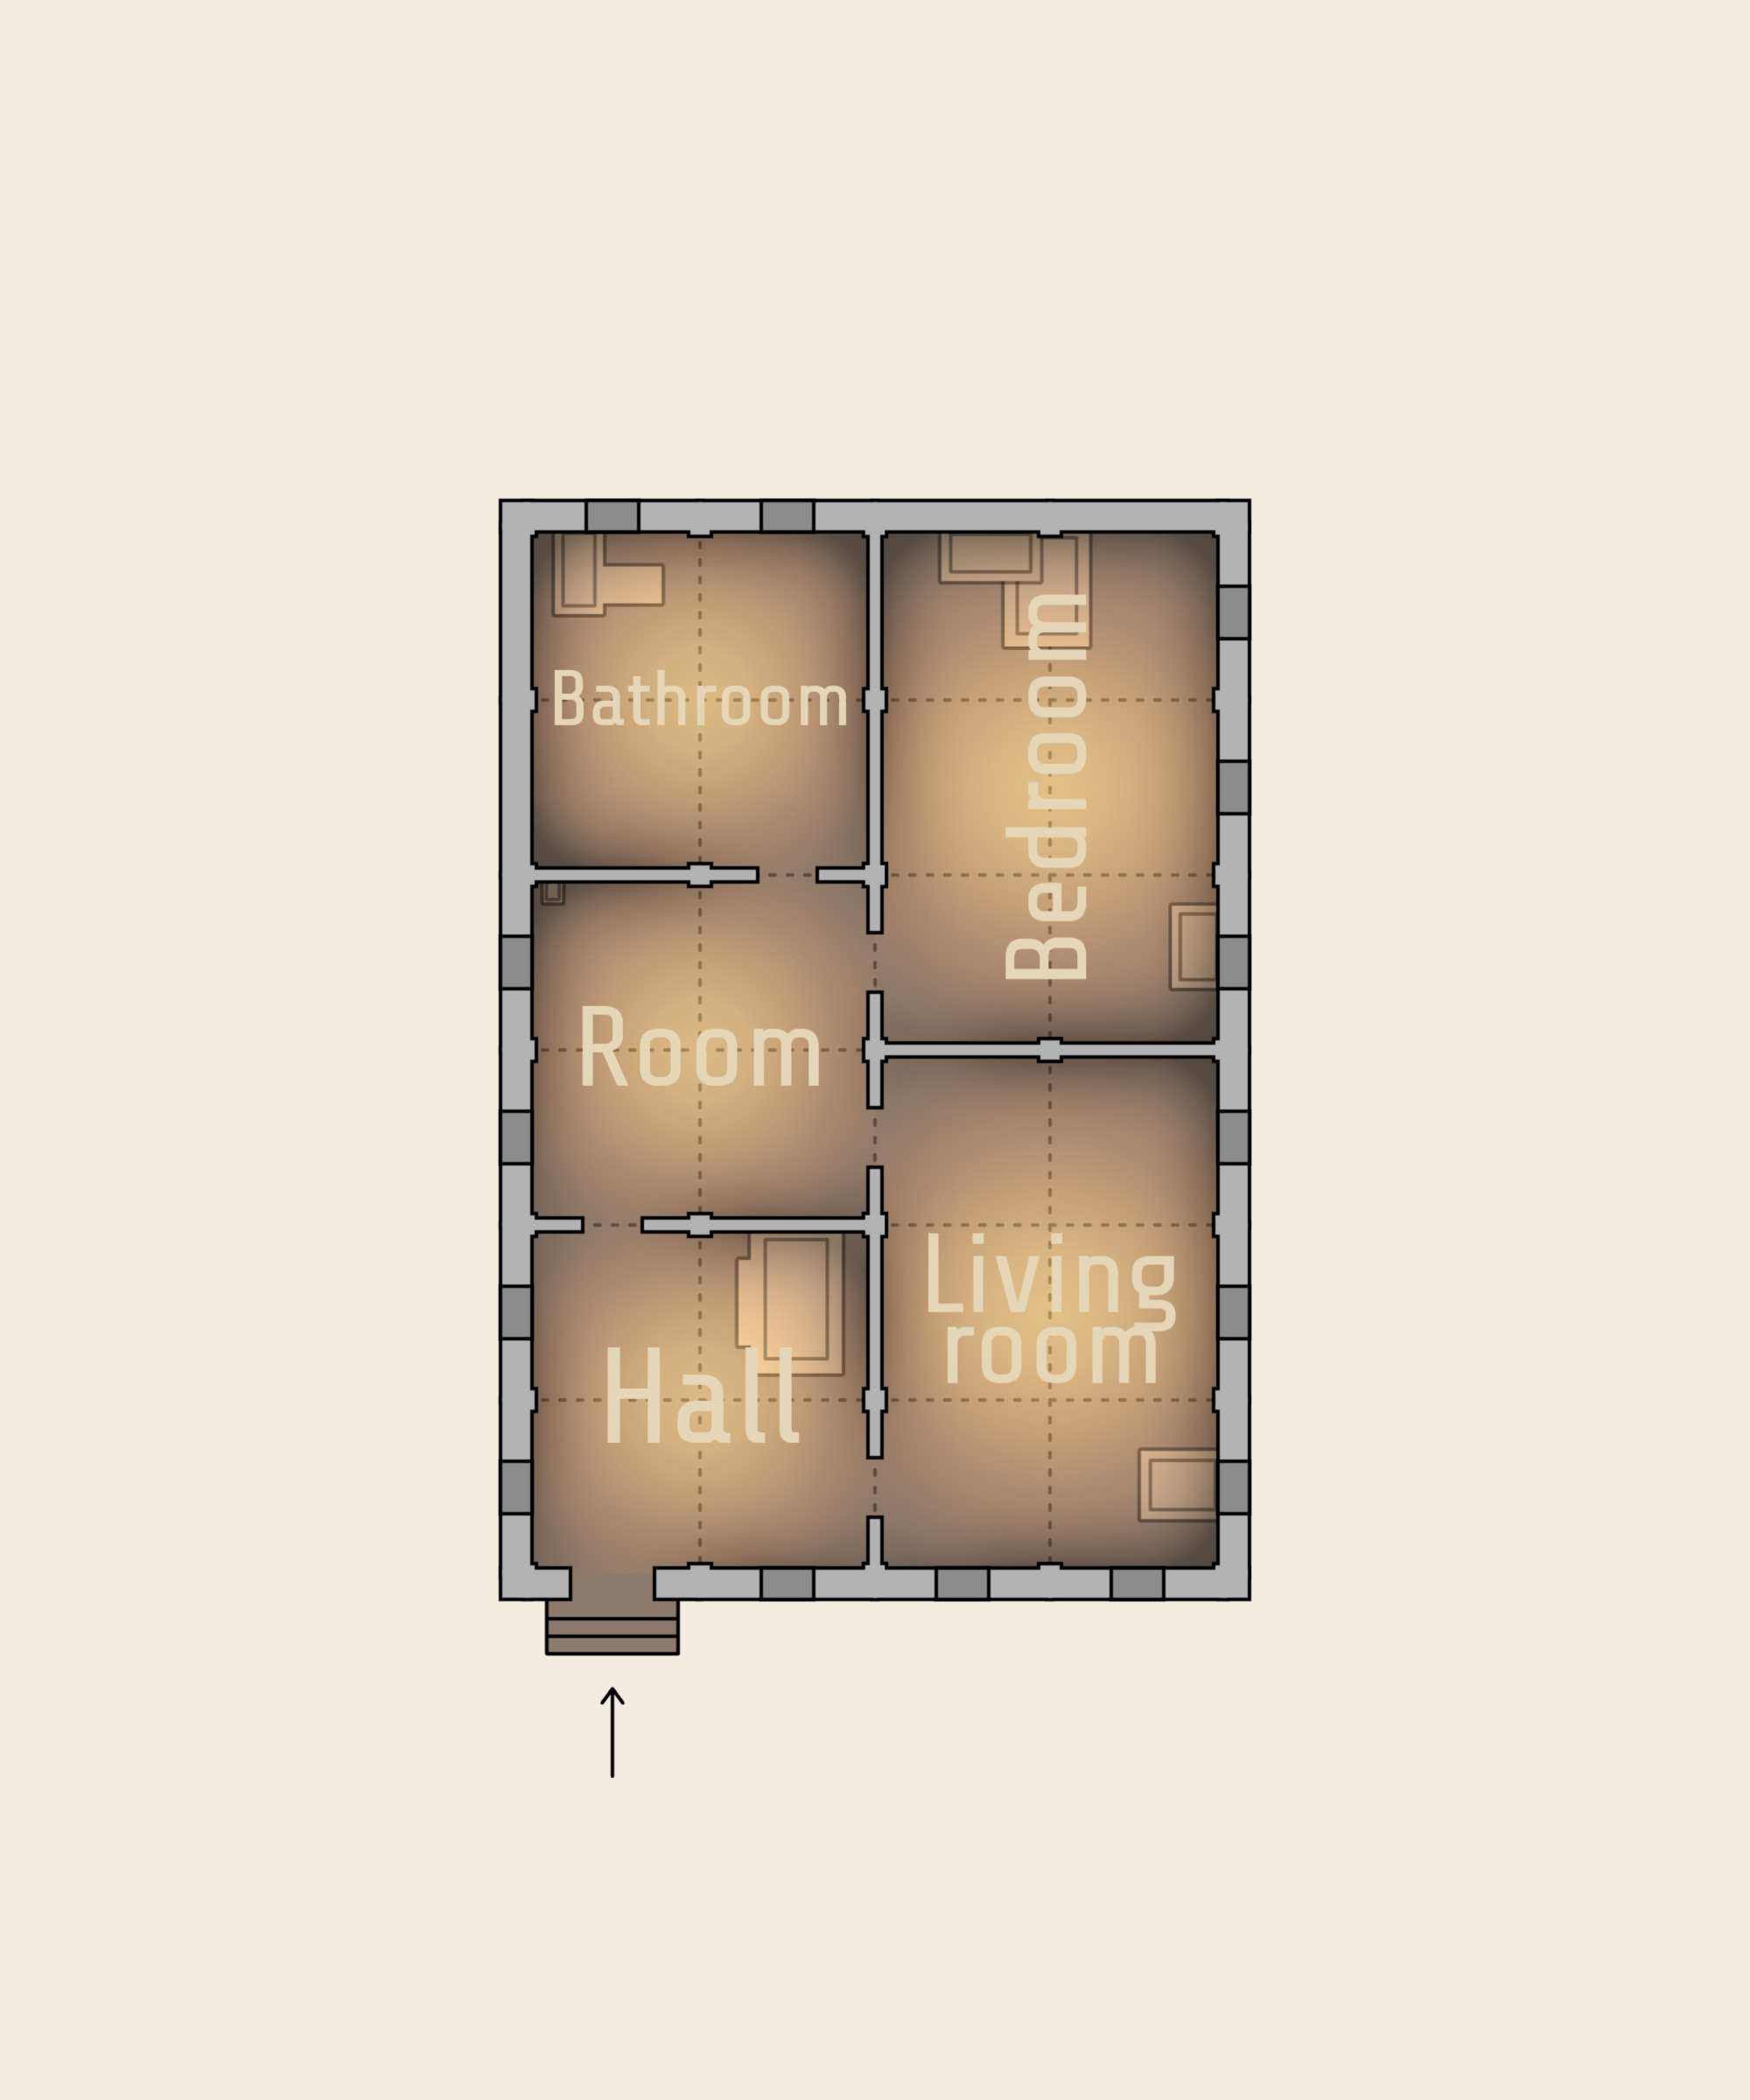
I chose the above for a square and rectangular layout to cater to both types of houses, the square and rectangular.
DunGen to generate dungeons
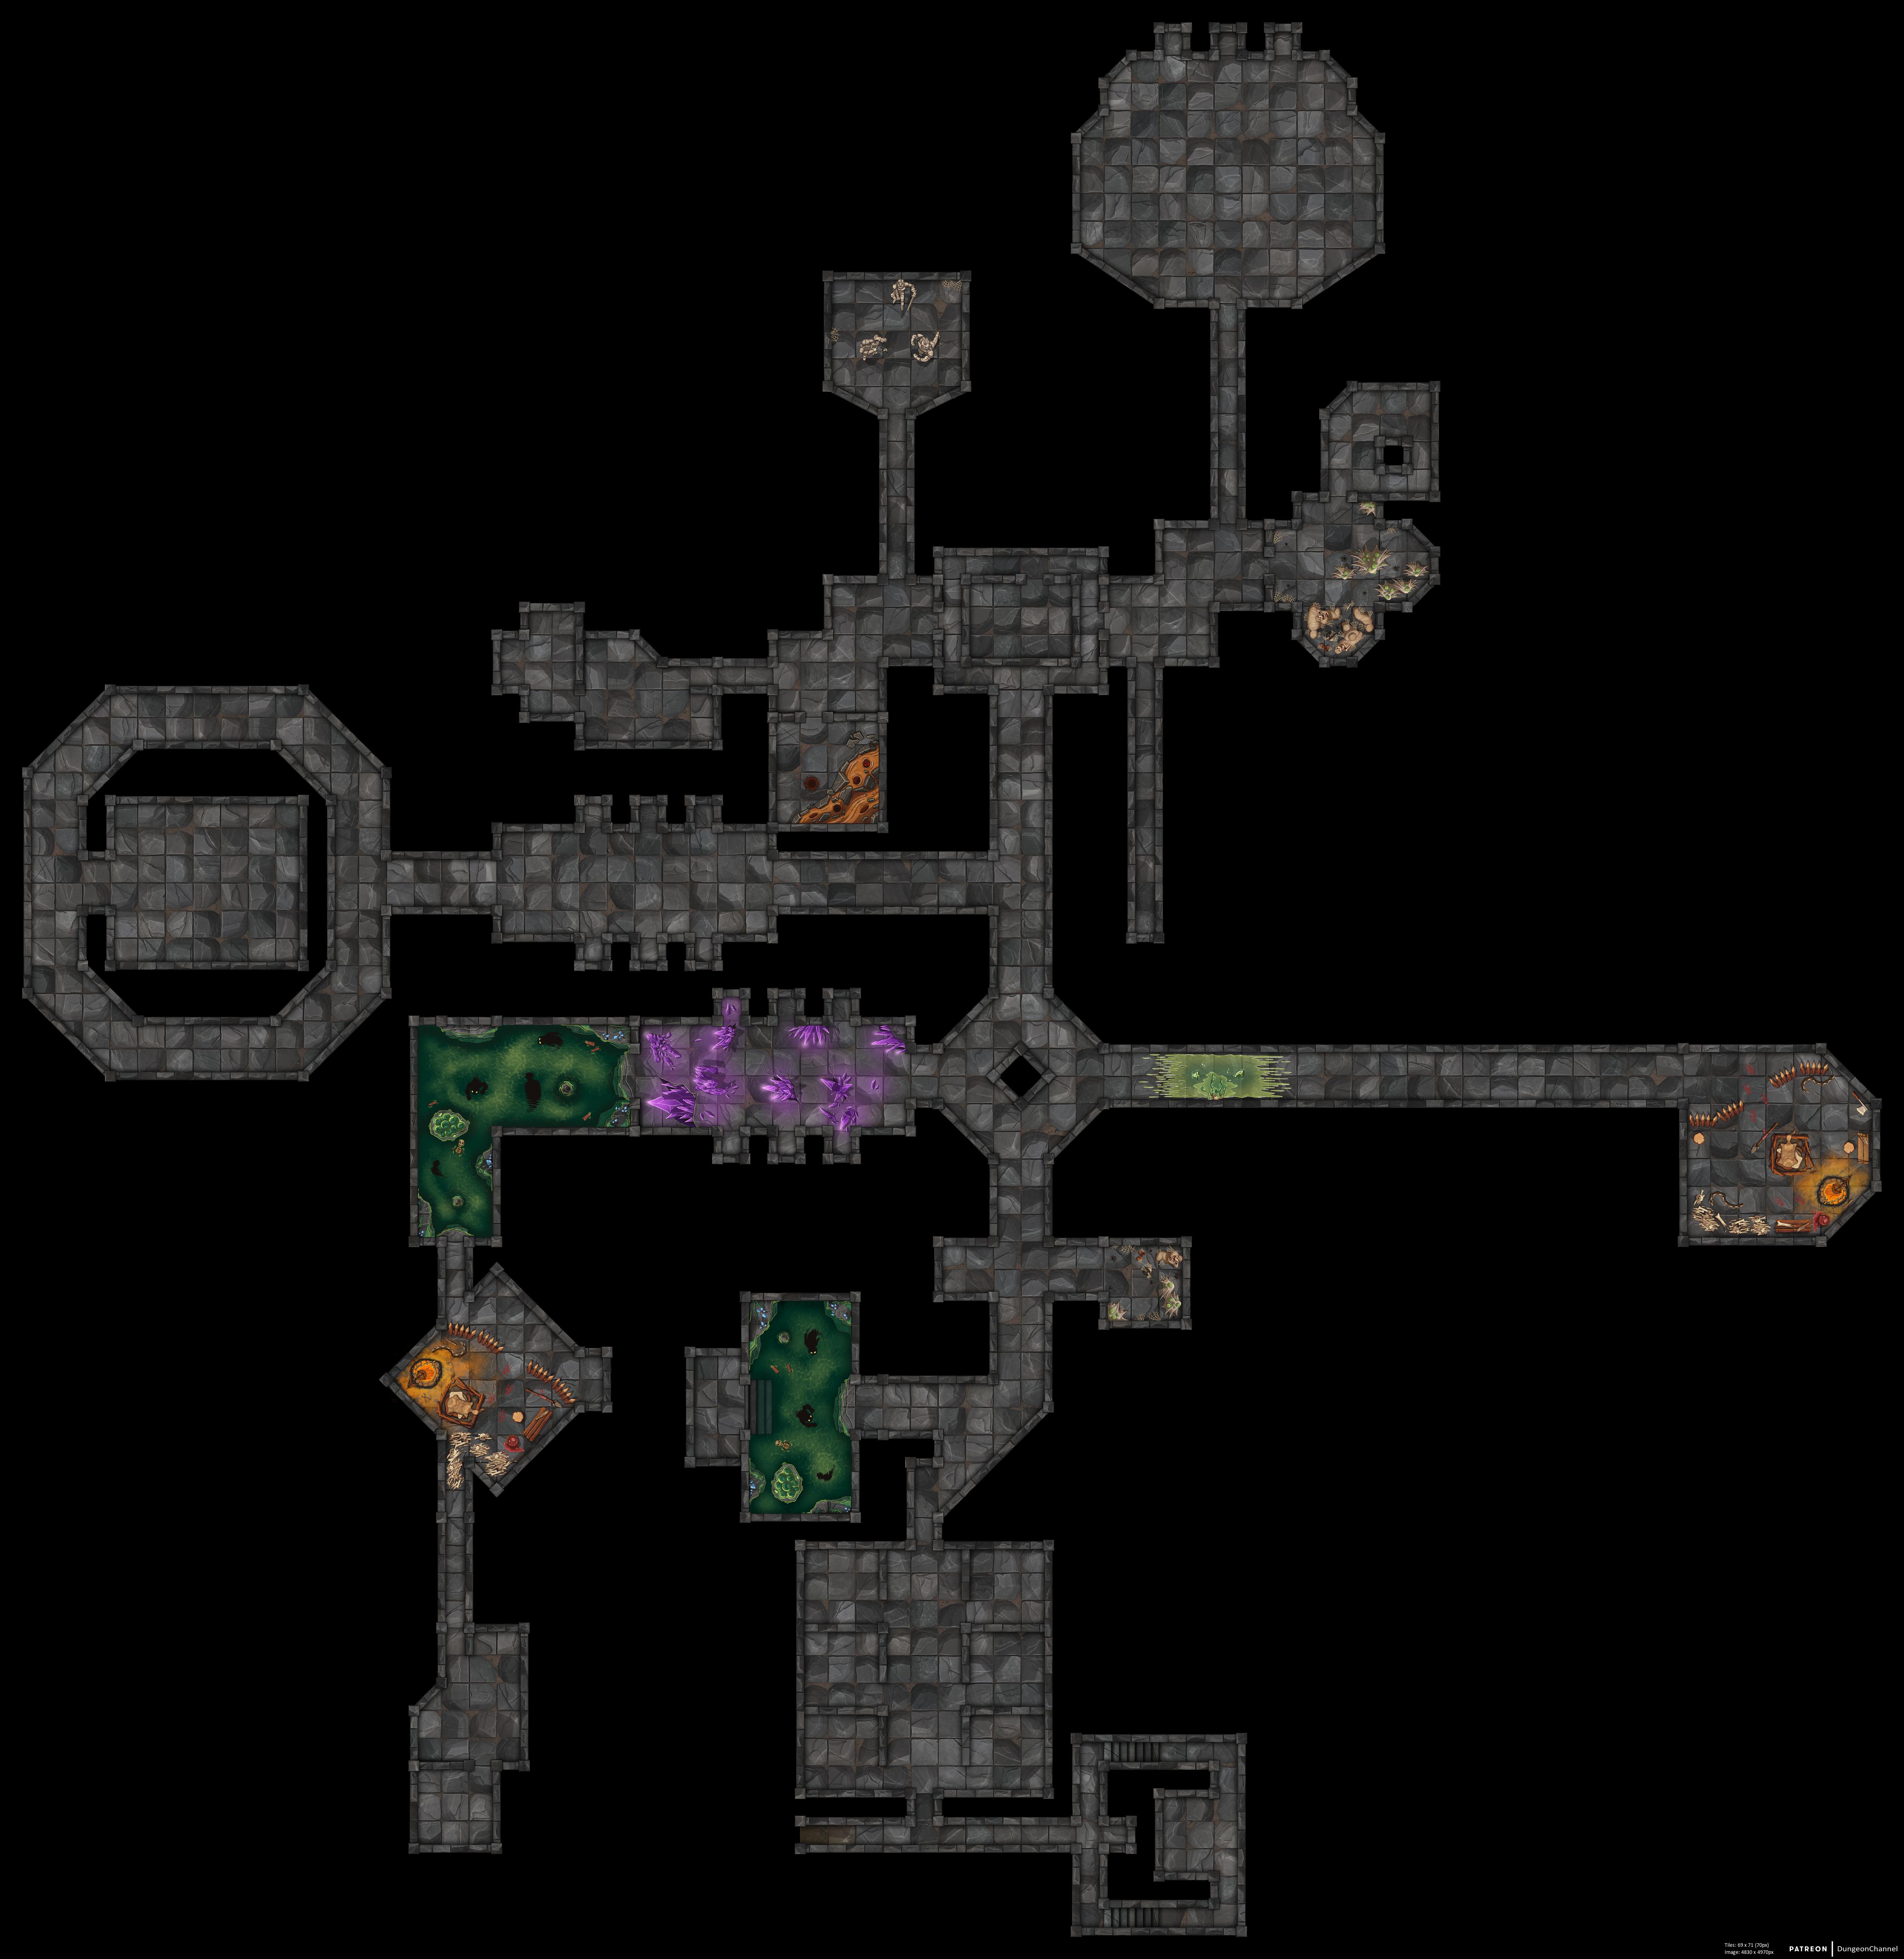
https://dungen.app/dungen/ is pretty neat! It not only generates dungeons, but the dungeons it generates are VTT friendly! That means, when I load the generated maps into Roll20, they perfectly align with the squares without any further editing needed.
On top of that, there are various options for generating dungeons with different sizes, furnishings, and themes.
Step 5: Naming my key characters
There was no way that I was going to crack my head on naming my characters. The solution was using a generator.
THE BEST fantasy name generator site is fantasynamegenerators.com/dungeons-and-dragons.php.
Naming characters was a piece of cake with fantasynamegenerators.com/dungeons-and-dragons.php.
A tip: It’s far easier to Google, “Orc name generator for D&D.” Click on Fantasy names Generator when it pops up from the search results and BAM! A list of random cool generated name.
That’s how I gave name to my boss Orc, Drarzell the Forsaken.
Step 6: Tinker with the enemy token mechanics of Roll20
Now that my dungeon (thanks to DunGen) is set on a page in Roll20, setting the enemy tokens came next. But I was noob at Roll20.
Fortunately, setting enemy tokens was as easy as:
- Searching for the monster I wanted under the compendium on the right as seen on the screen shot below
- Click, hold and dragging the monster out to the desired location on the map
The tutorial by Roll20 recommended Kobold Plus Fight Club as a quick method to filter out the enemies required to match the level of your players. I initially used it to find monsters of the challenge rating; however, I later utilized the Monster List in Roll20 as they had a challenge rating bar I could tweak too.
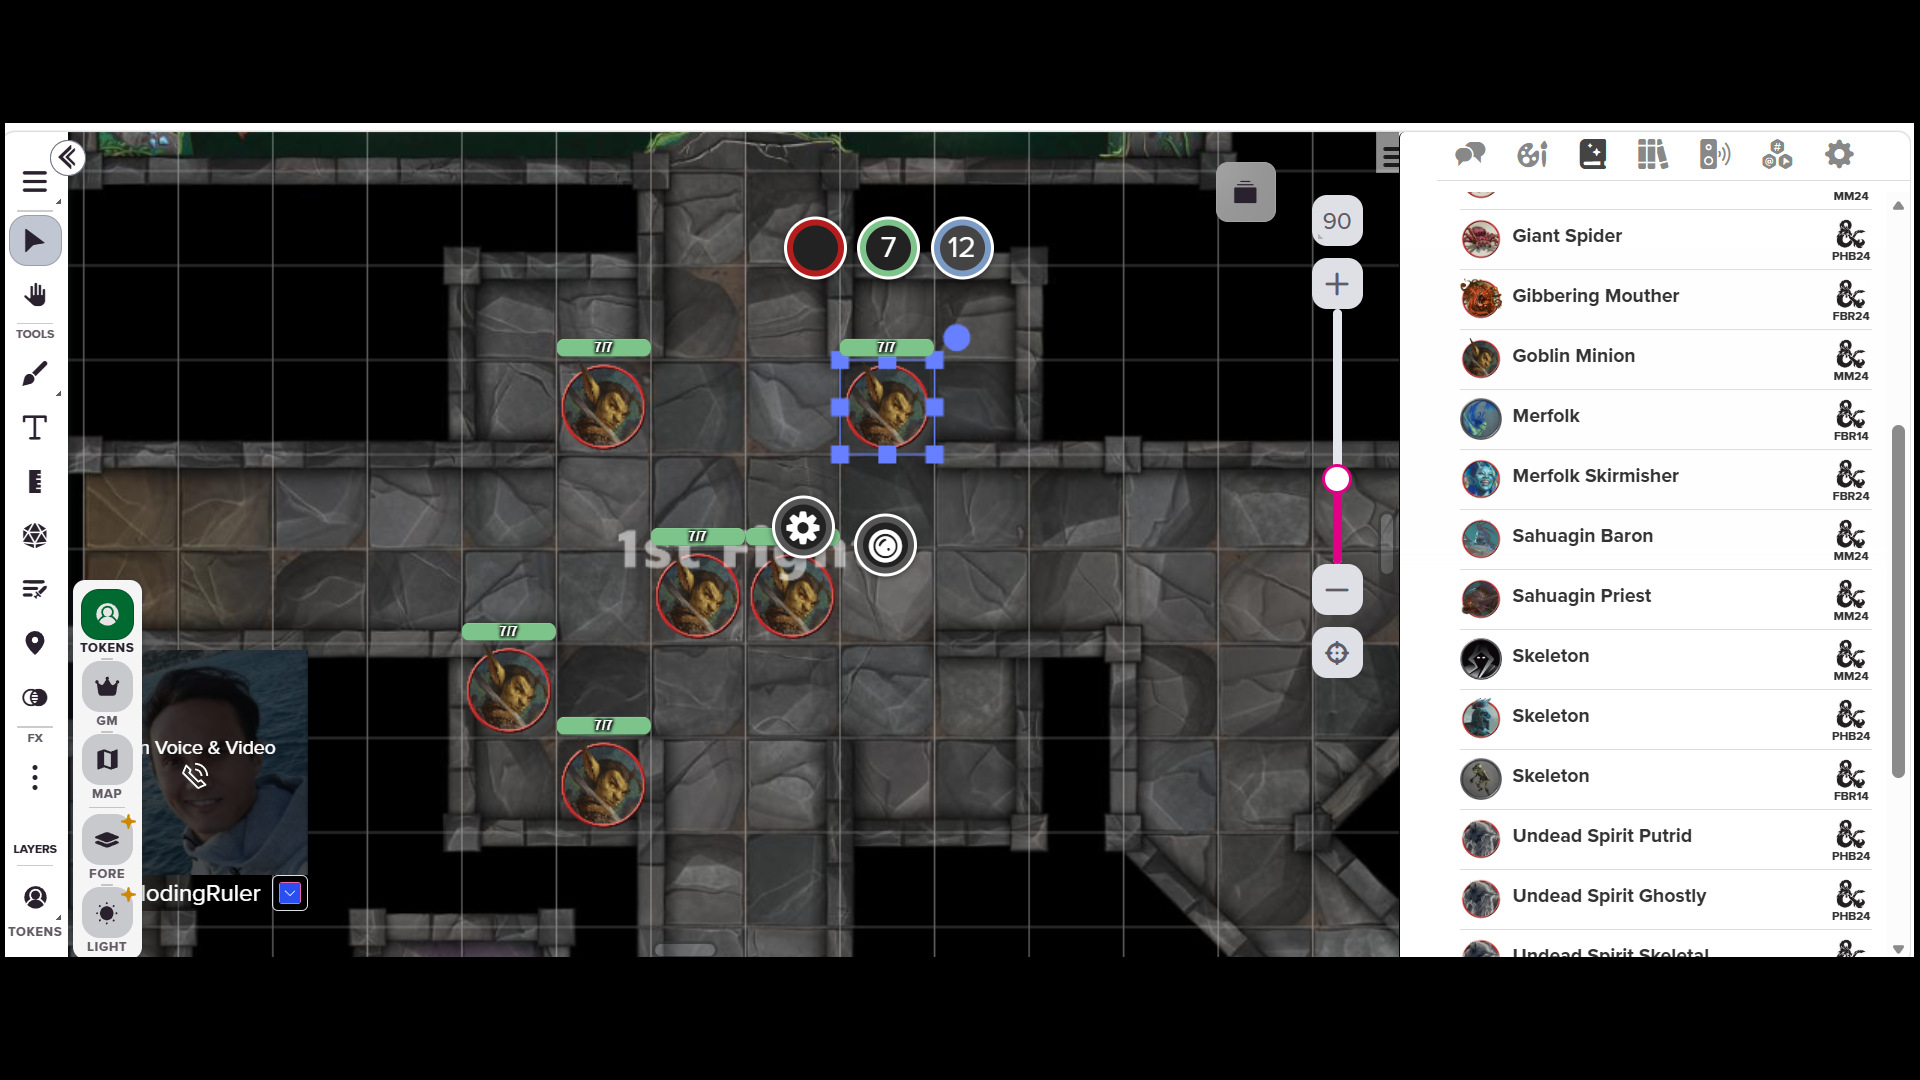
Once the tokens are on the map, left click on the token to find the Hit Points (HP) as the seen in the green bubble hovering above the token. Similarly, the Armor Class (AC) is recorded in the blue bubble overhead.
Right-click on the enemy token and select ‘open character sheet’ to reveal its stat-block. The stat-block mechanics is what I needed to familiarize myself with next as I was new to DnD and Roll20.
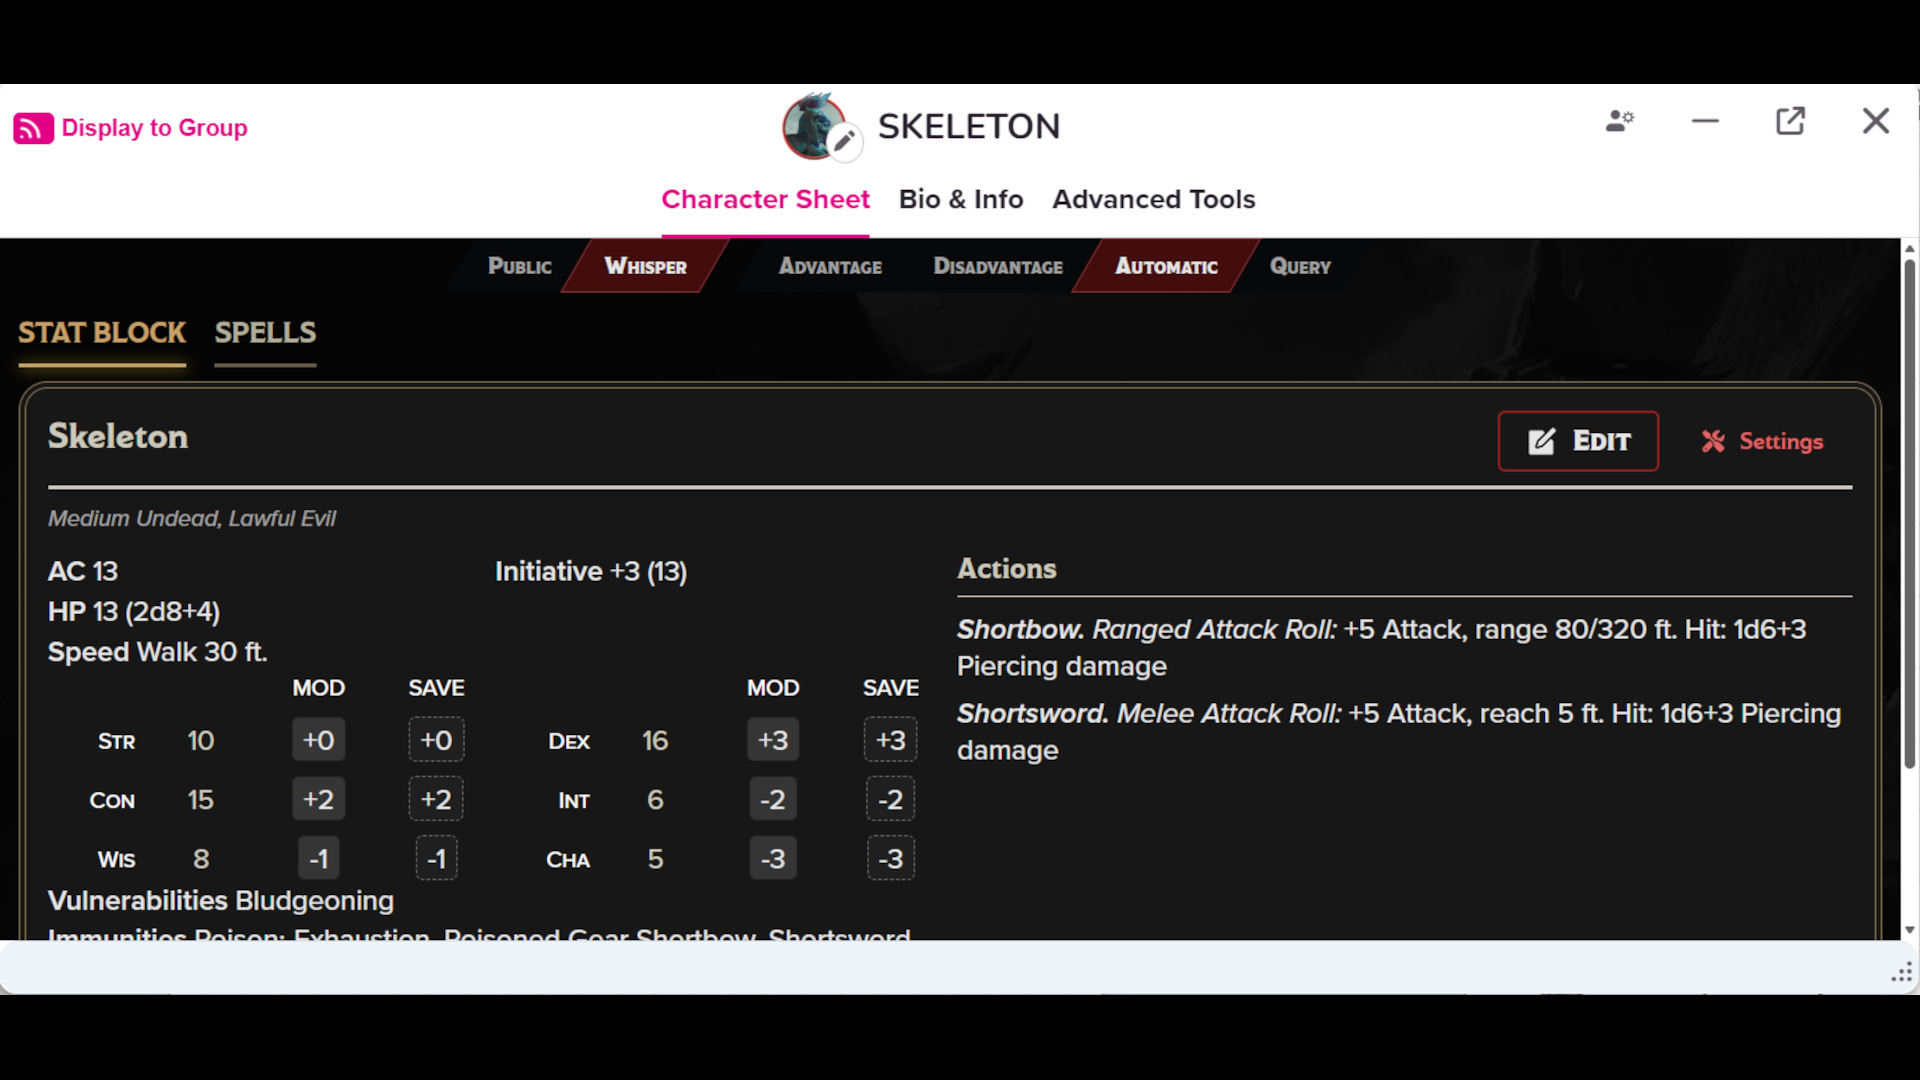
Step 7: Create custom characters like my custom boss for the dungeon and the Maiden NPC
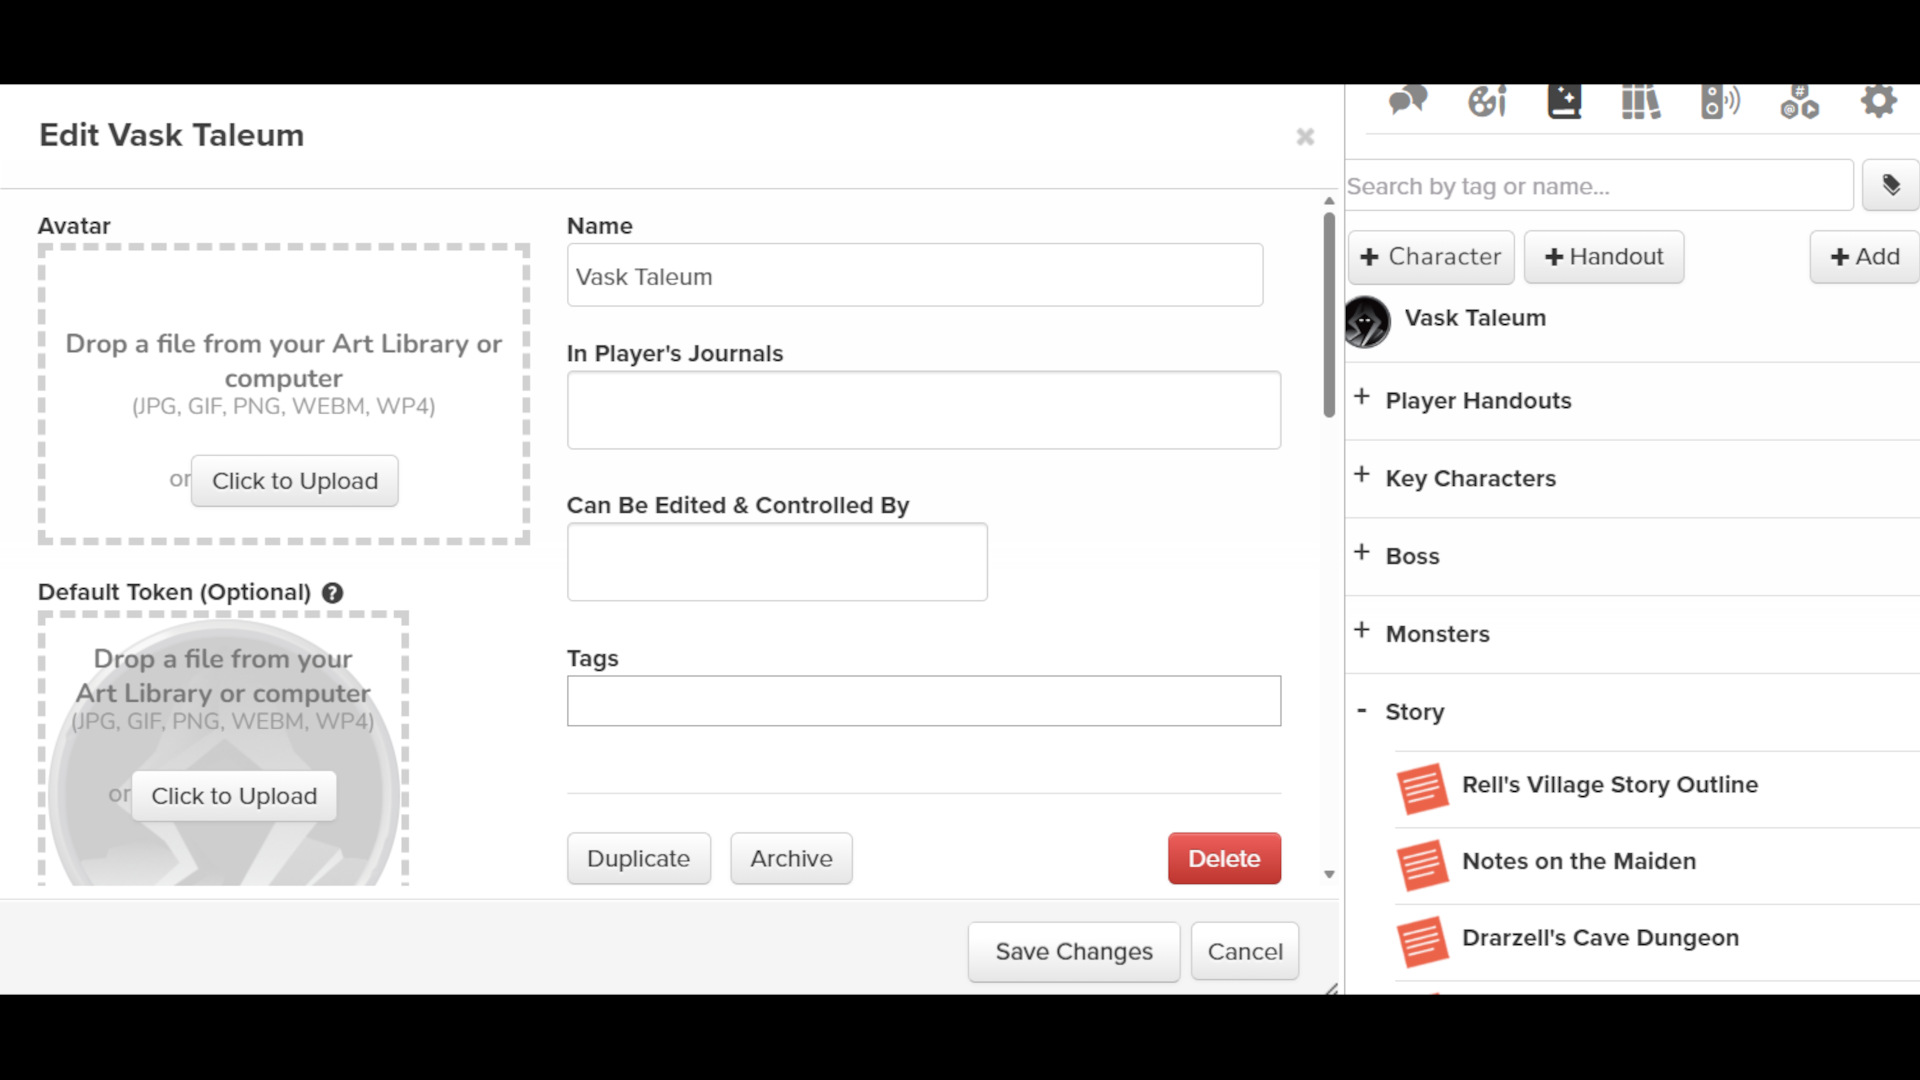
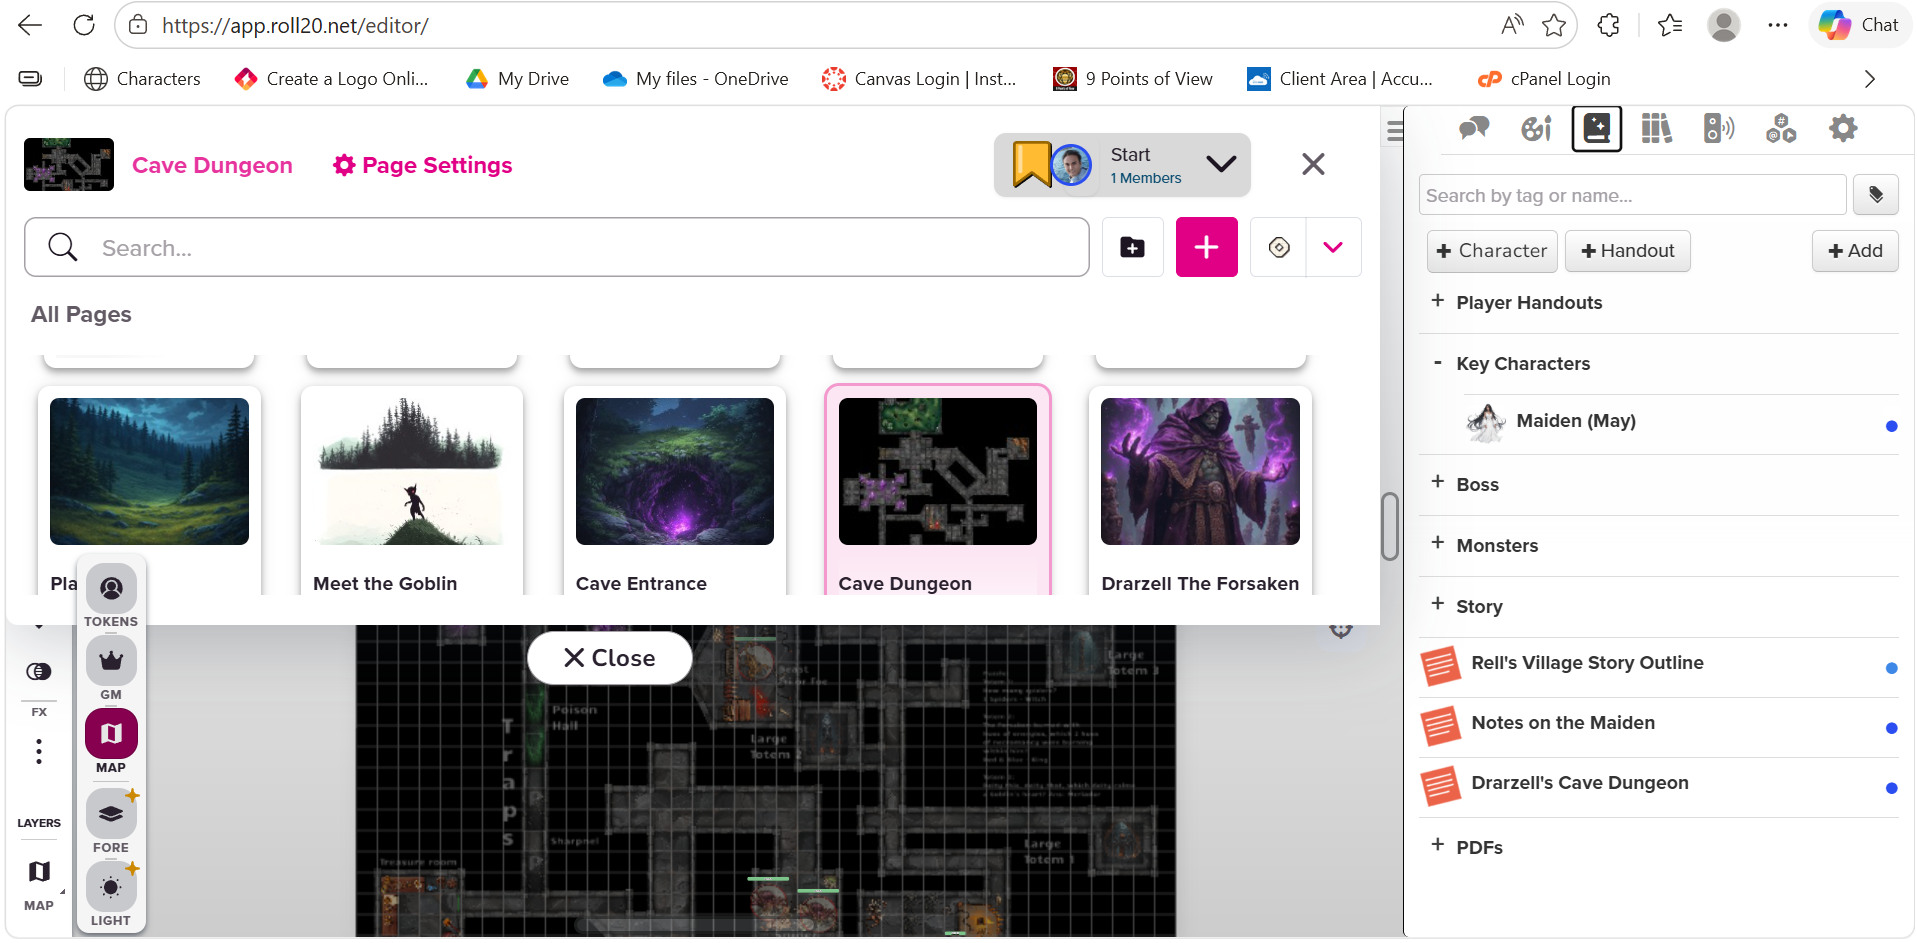
Click on the “+ Character” button on the top right under the Journal section to create a new character from scratch in your Roll20 campaign.
A character window immediately pops-up with a random editable name and a blank space to key in the character’s bio at the bottom. The “Avatar” and “Default Token” spaces are for dropping in the art of your character.
After saving changes to this page and closing the window, a new window loads to the page below:
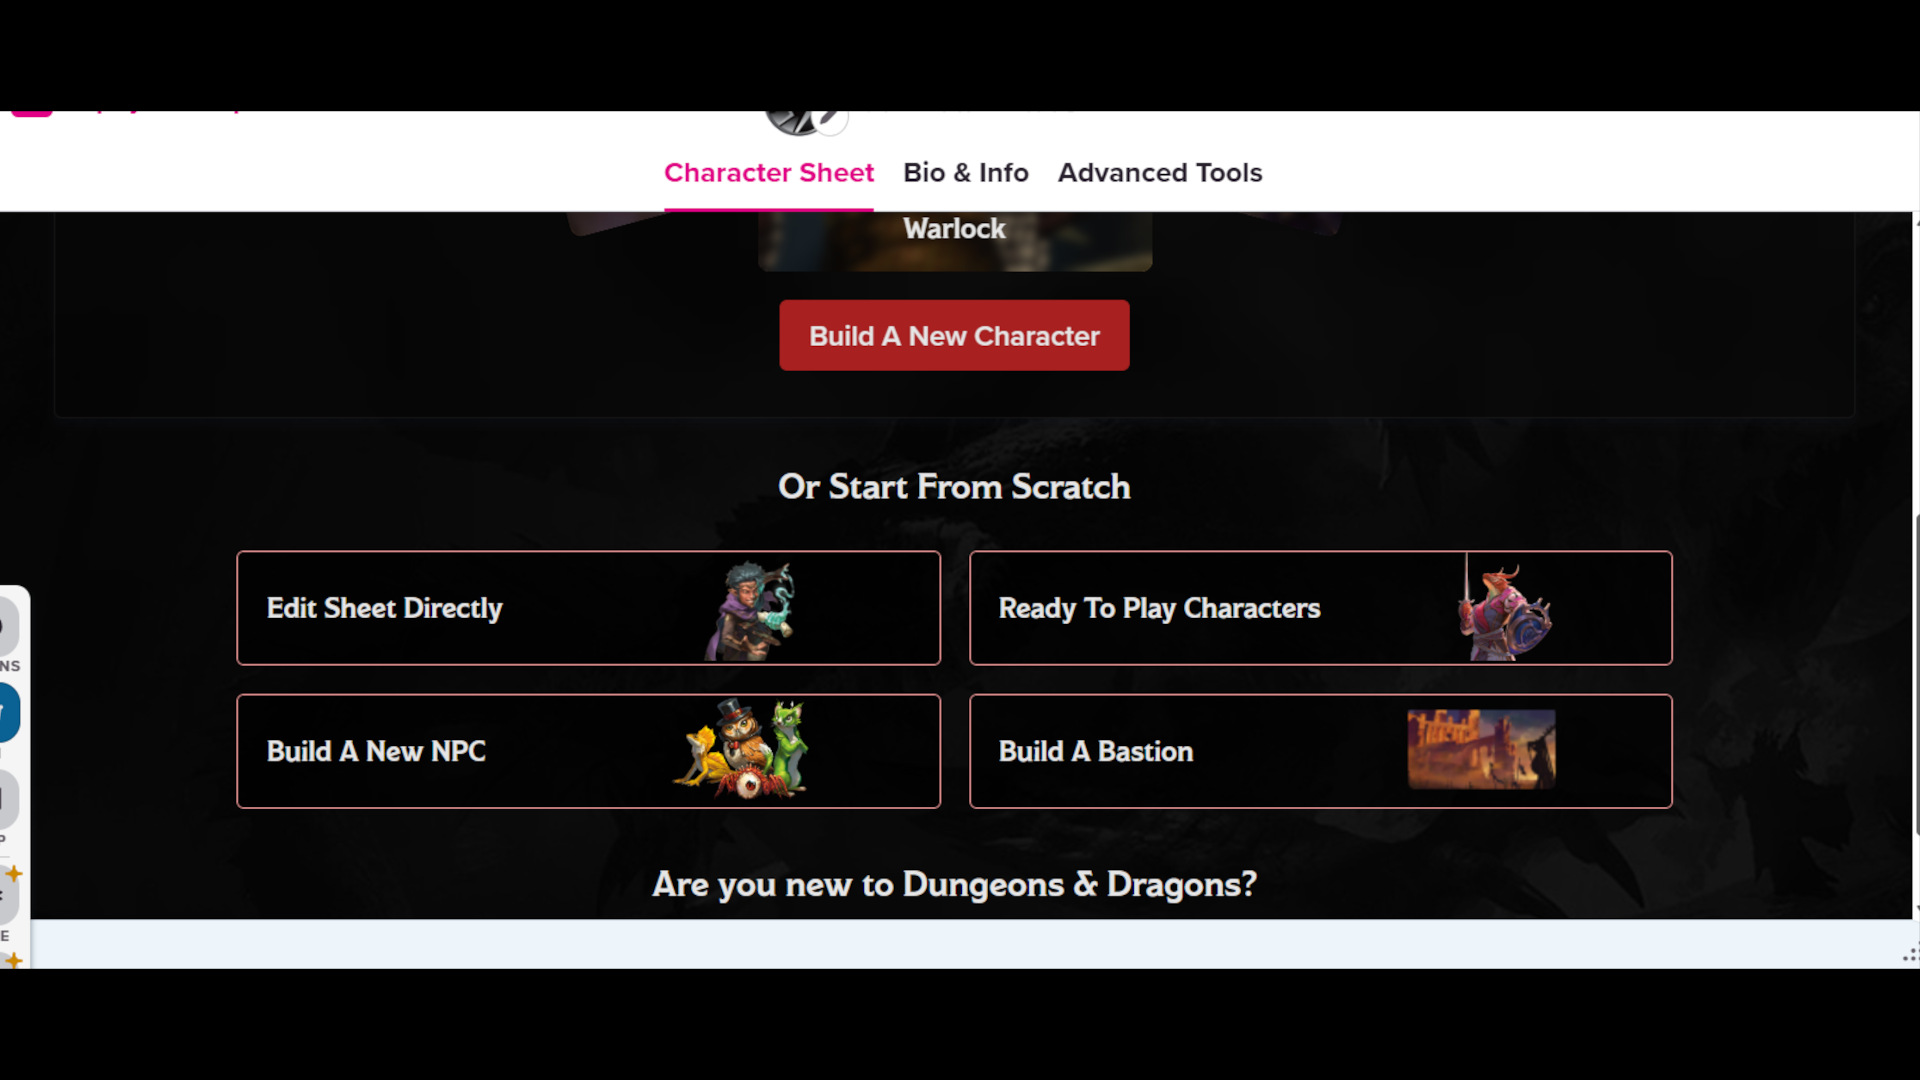
I’m the kind of guy that usually skips the step-by-step instructions, so I went for the “Edit Sheet Directly” option to manually set all the stats of my character while simultaneously checking up what each stat meant from the Player’s Handbook on Roll20.
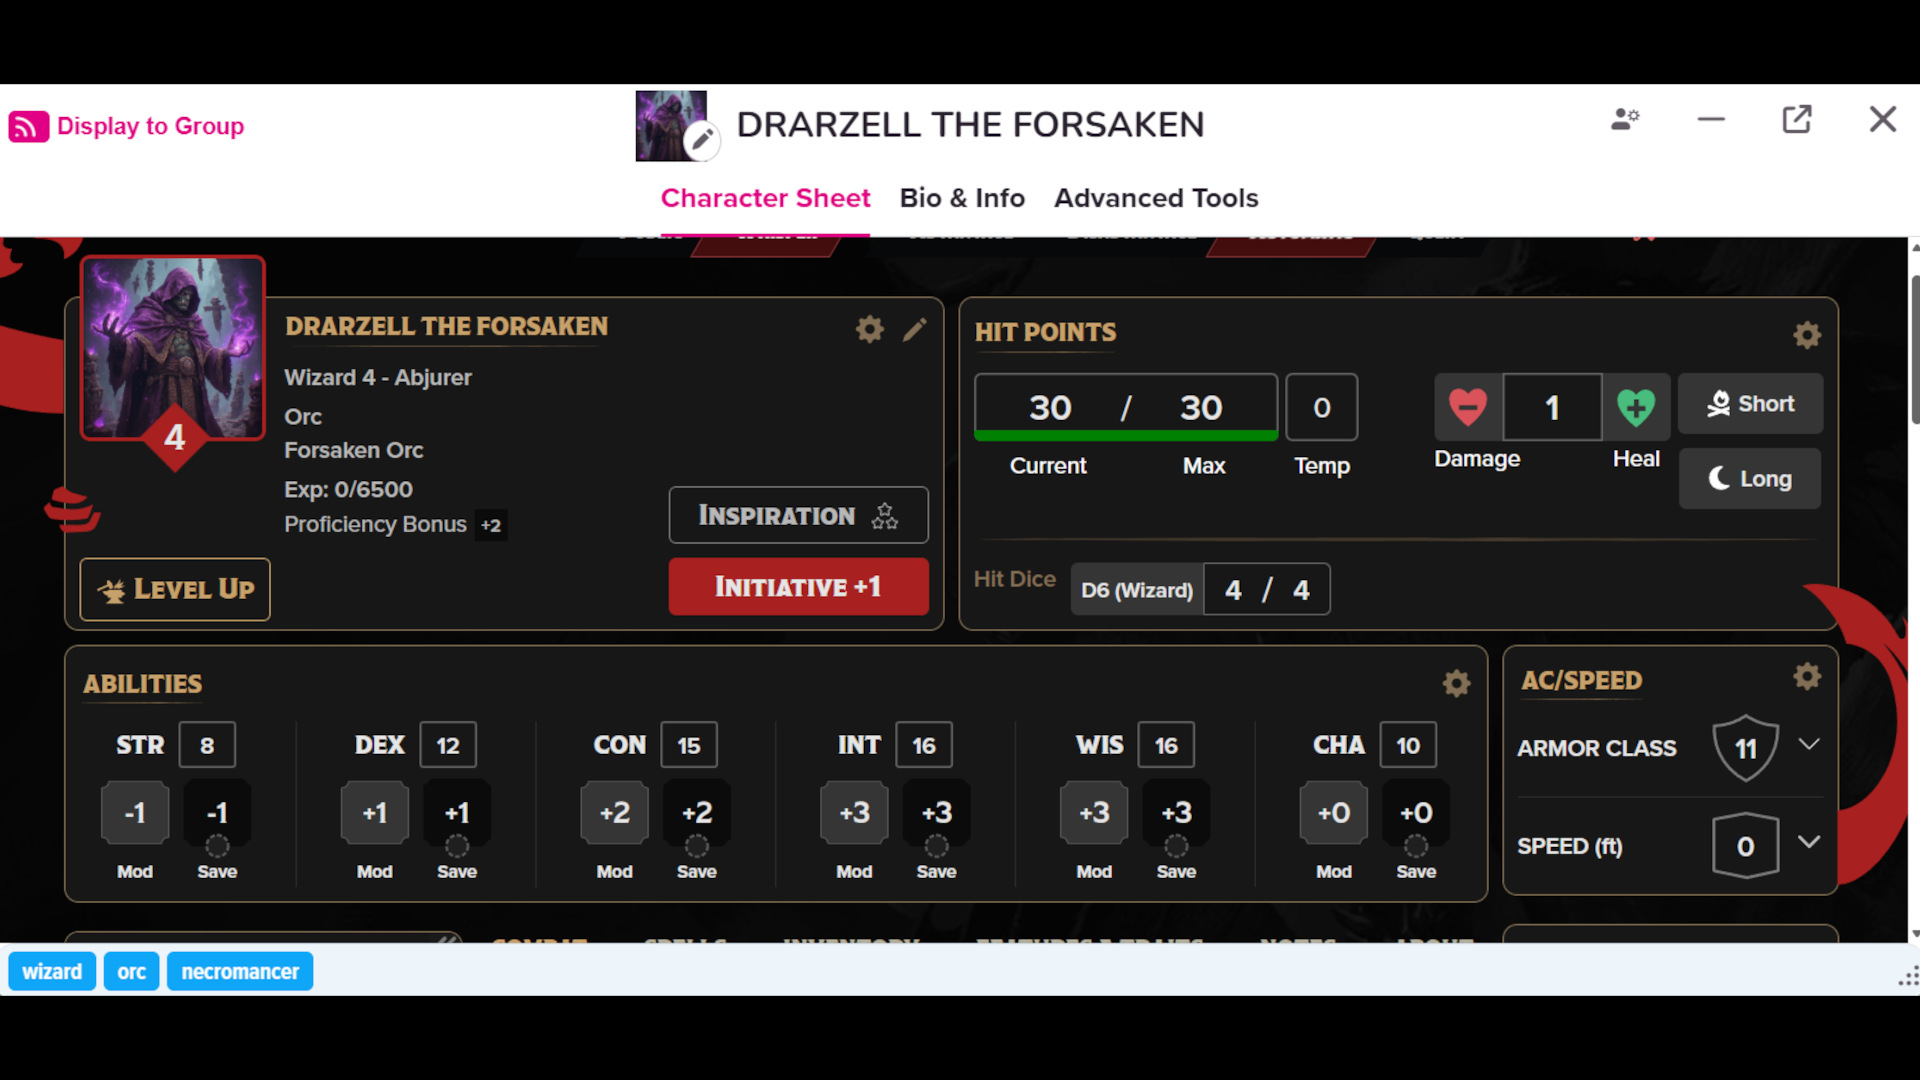
I had a lot of fun populating these stats manually for Drarzell the Forsaken, the boss at the end of my dungeon. Needless to say, I would be playing him against my players, so I wanted a kickass boss.
After hours of reading on character attributes, dragging and dropping cantrips and spells from the Compendium section into the stat-block for my Level 4 boss (yes, it’s that easy), and “tearing my hair out” trying to find out how “Hit Dice” worked for the different classes to work out their hit points, I finally conquered the “Edit Sheet Directly” function of character creation on Roll20’s DnD 5E 2024.
Did I say “tear my hair out” when calculating hit points for characters? Here’s another VERY helpful generator to do that: 5ehpcalculator.com/. You’re welcome.
I proceeded to create a character sheet for the annoying Maiden NPC who accompanies my players throughout the campaign. Reinforcing my understanding in editing character sheets from scratch.
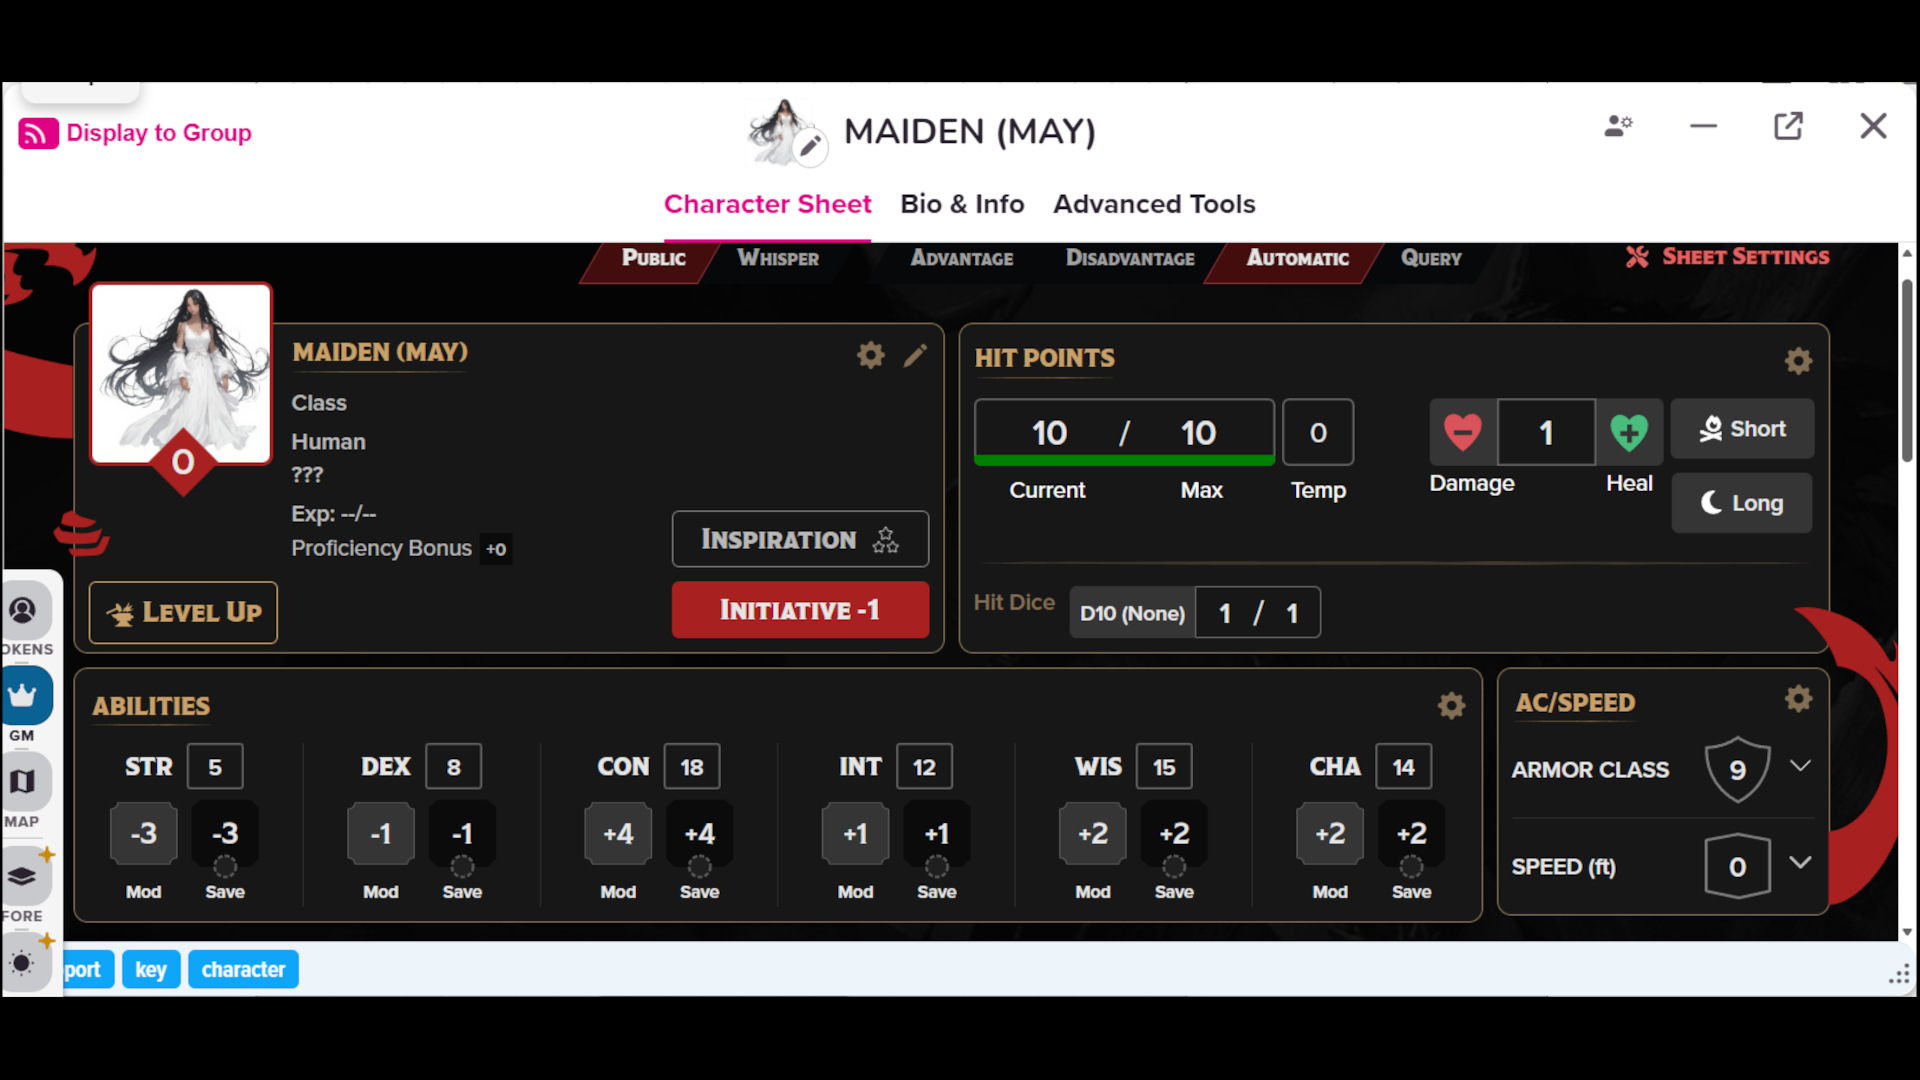
Editing the character sheet really sped up my understanding of the character sheet in DnD but I won’t recommend it if you need Roll20’s system to automatically work for your character.
I highly recommend clicking on ‘Build a New Character’ when you are starting out and using the step-by-step character builder to build a fully playable character that is fully compliant with the automation that Roll20 provides for character play. All my players used the ‘Build a New Character’ function.
Use the ‘Edit Sheet Directly’ only if you want to customize an out of the box character.
Step 8: Type out the GM notes for my story, enemy drops and dungeon loot
Although Roll20’s tutorial provided a systematic workflow for new Roll20 users to adopt as a best practice for creating campaigns by typing out the outline for GM as a handout, I decided to type out my outlines after I have completely set up my campaign assets.
In fact, I text and image labelled a lot on the GM layer to avoid whipping out my outline as much as possible in the middle of an immersive gameplay. Sort of using the GM layer as a teleprompter.
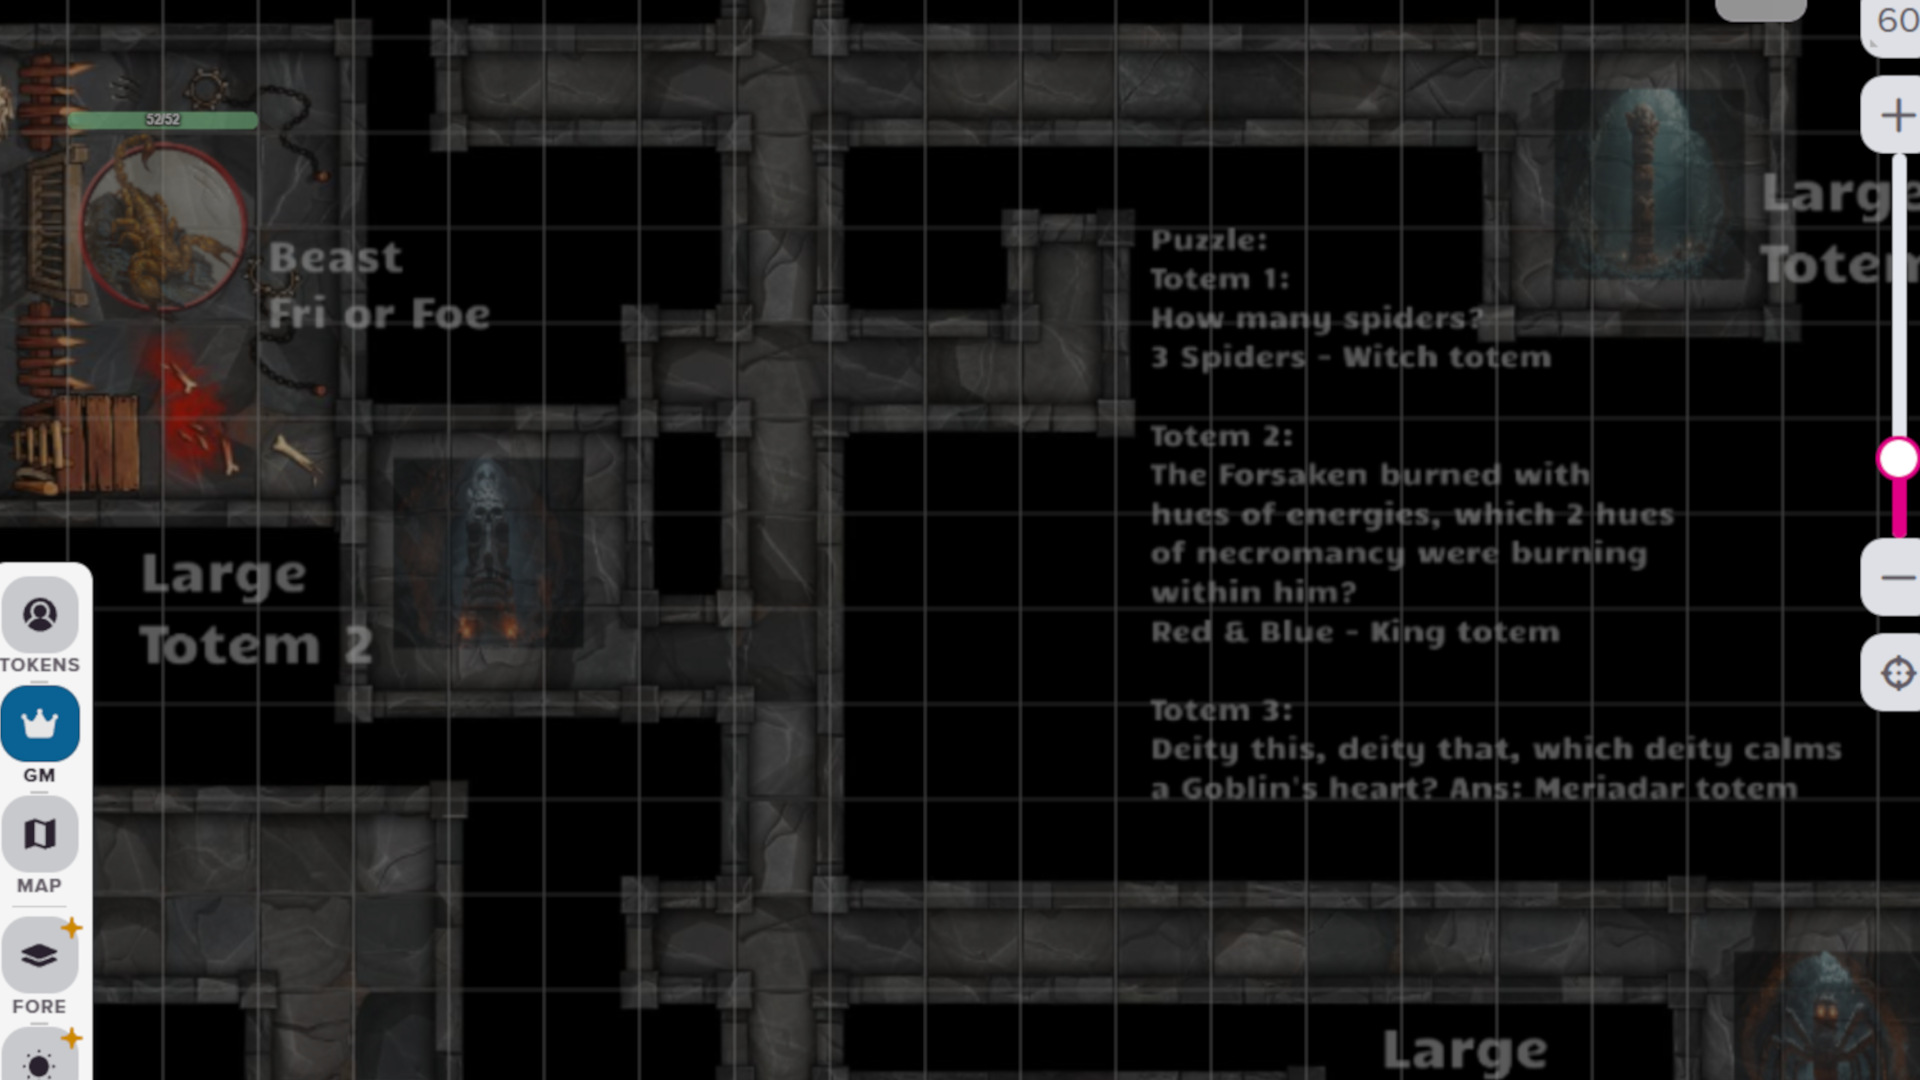
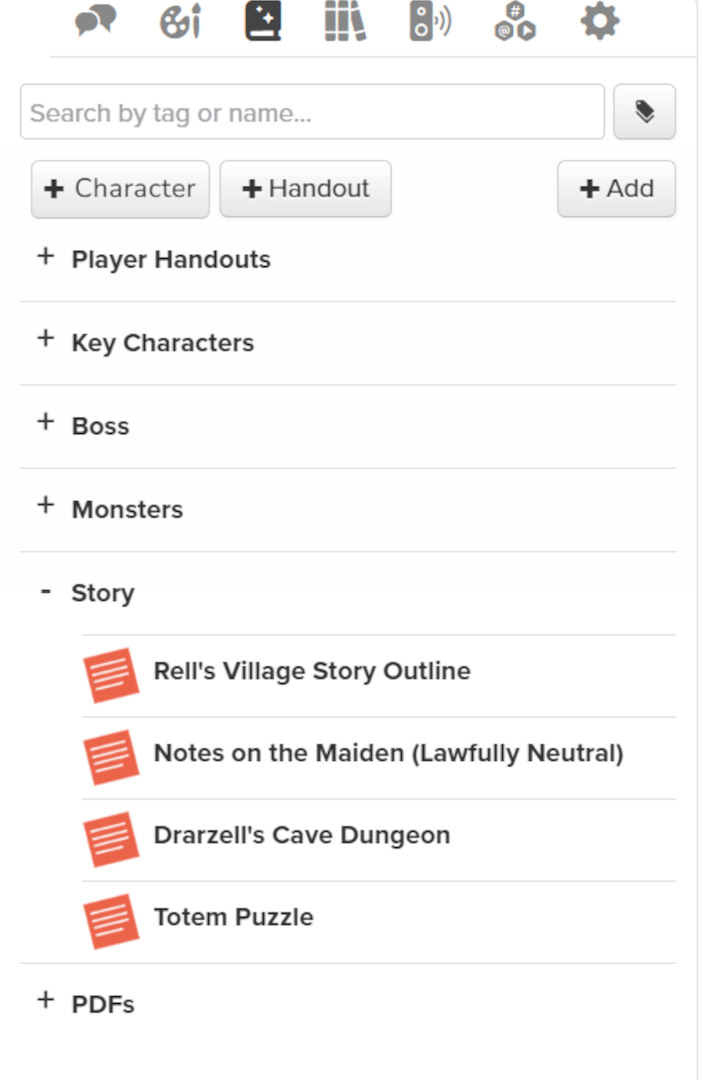
I typed every other detail, from the campaign storyline, extra details on characters, loot drops, and additional information as outlines by clicking on the “+ Handout” under the Journal section.
A part of my dungeon as generated by DunGen was filled with what looked like a mineral/mushroom dense room for players to raid.
Having absolutely zero knowledge of mushroom species in DnD, I turned to the web of things again to find out what mushrooms I could layout for my players according to DnD lore for my players.
I found dndspeak.com/2020/08/19/100-mushrooms-and-their-effects for a list of 100 mushrooms.
Loot drops from my boss, Drarzell were not listed anywhere in my outlines as I wanted my players to intentionally search his corpse if they murdered him or pickpocket his belt while he was alive to obtain his rare drops. Therefore, I left the details of what he carried in his character sheet.
At this point of time, I haven’t decided the need to include any notes dropped by enemies or notes kept by NPCs. I’ll definitely add those notes for players to obtain through the game when I have more time.
Step 9: Explore the Jukebox in Roll20 to add music
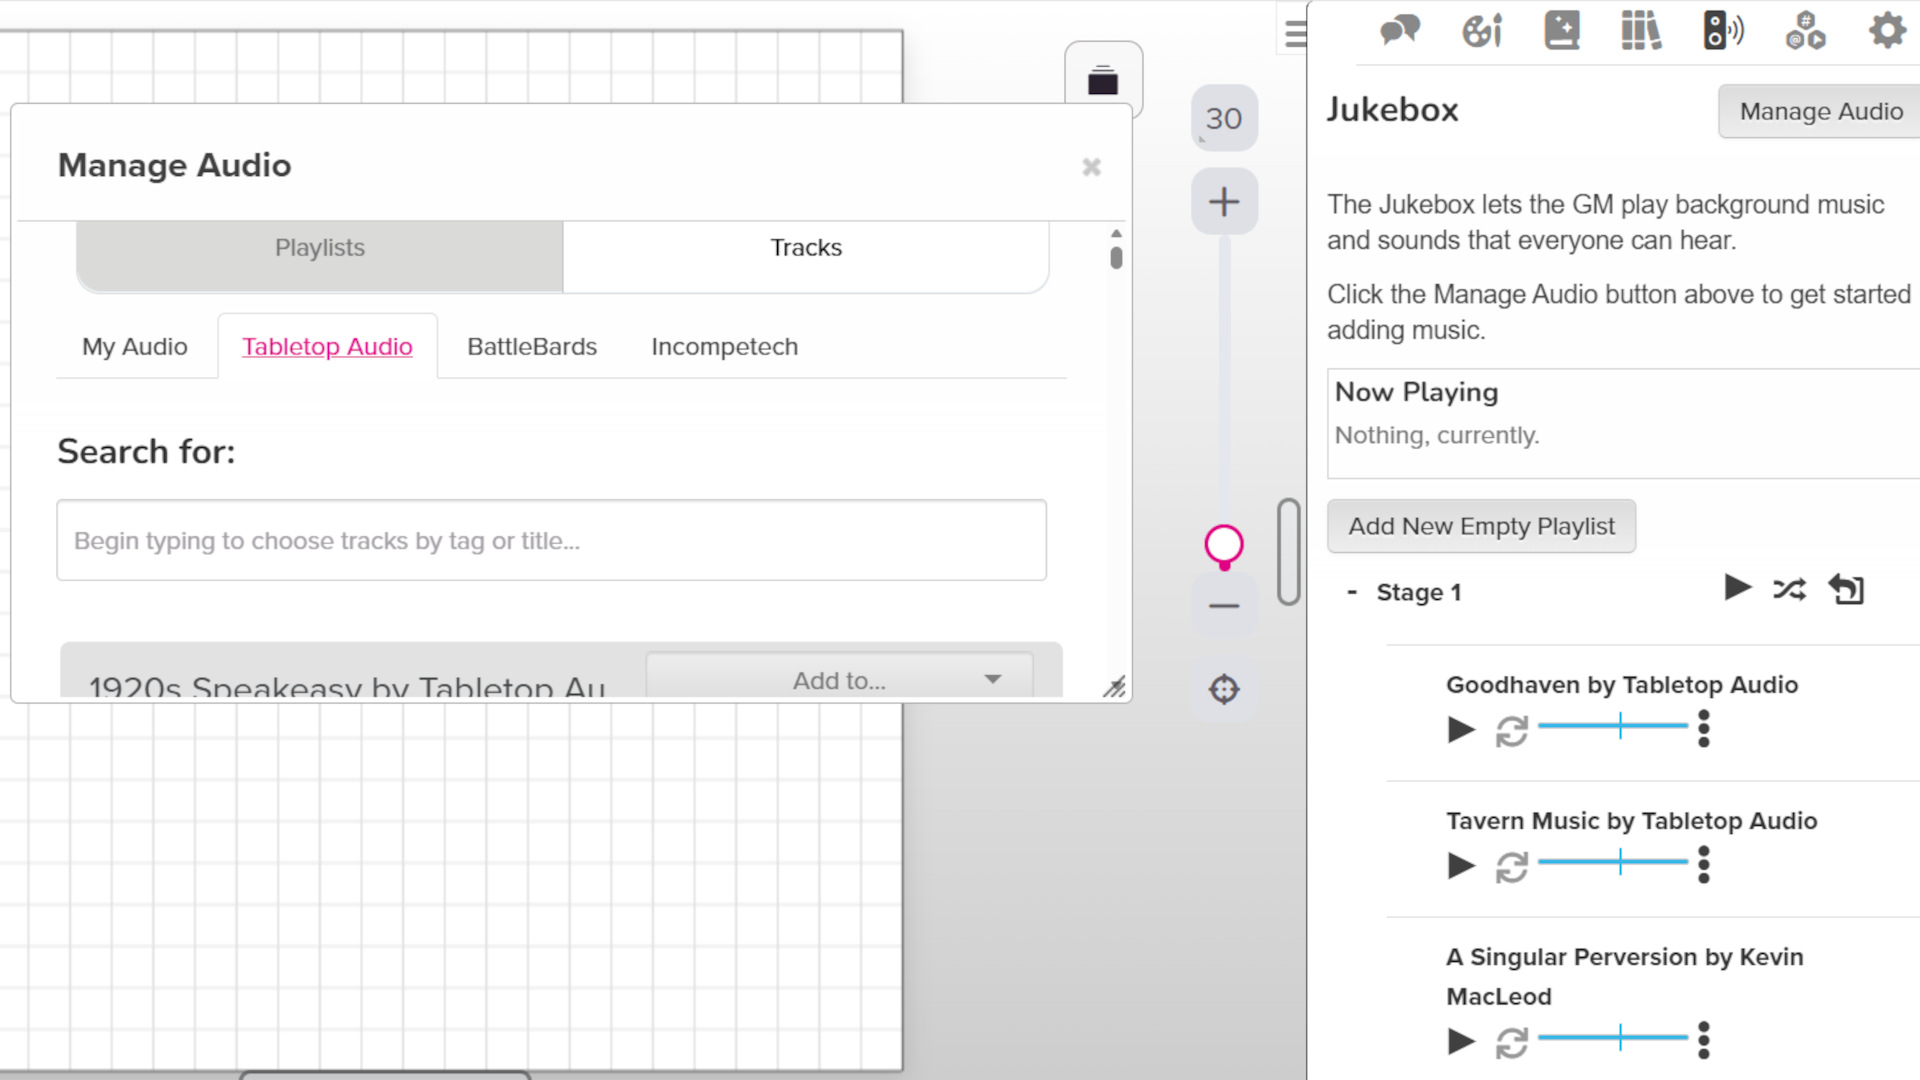
What is an adventure without epic background music eh?
Now that I’ve finally setup the stage for my players, I went exploring Roll20’s Jukebox by clicking on that speaker icon on the top-right. Doing that will reveal an initial empty column.
Click on “Manage Audio” and select “Tracks” from the new pop-up window to find a bunch of tracks to play from within Roll20’s Jukebox.
There was an option to upload tracks from my device, but I went with what was available in the VTT to save time.
I spent some time filtering tracks from the three audio providers, TableTop Audio, BattleBards, and Incompetech to find the most suitable ones for my game.
And, voilà! MY FIRST GAME WAS FINALLY READY FOR PLAY.
Step 10: Practice Reveal Mask, FX and Measure Tool to create an immersive experience for Players
My game was ready for players but was I ready to DM?
I tinkered with the Hide/Reveal Mask, FX and Measure Tool last to fine tune my preparation for role-playing with the VTT as a DM to create the best adventure experience for my players.
The only tool that wasn’t covered in the Roll20 tutorial was the FX Tool! Because I wondered if there was something available to produce effects for my players in the free version of Roll20. Enter the FX Tool.
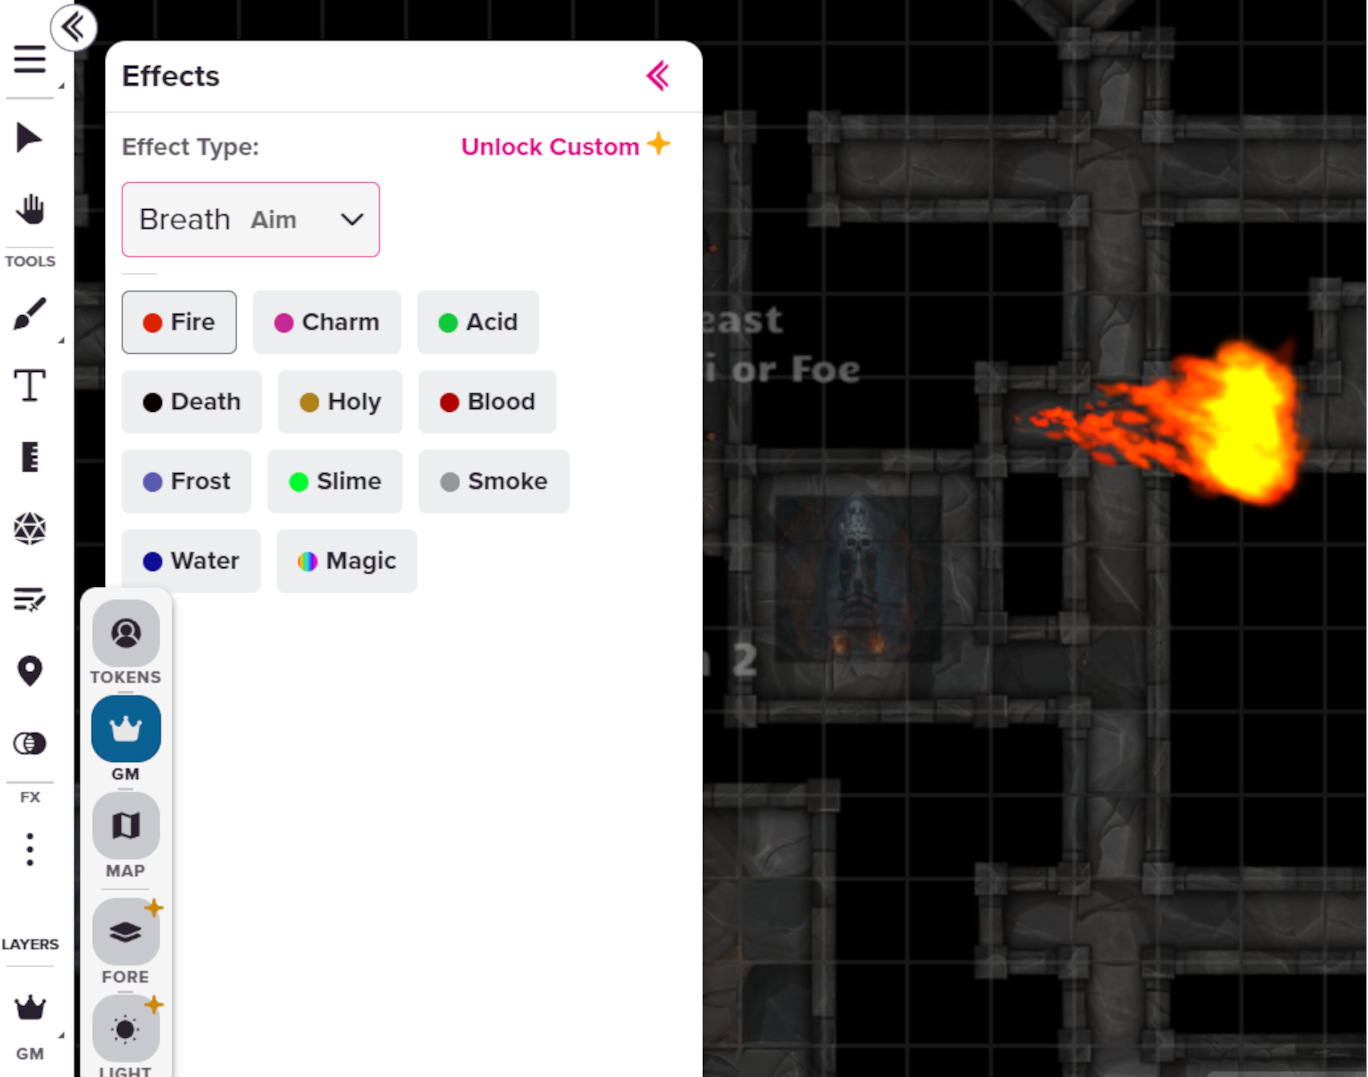
It was super easy to use. Select the effect type, read the trigger mechanism, be it Aim (click drag and let go), Hold (click and hold), or Click and watch the effect come alive!
Summary
I had a blast creating my first campaign! But the ideas aren’t stopping. My head is just bursting with new inspiration daily, tweaking my adventure within the theater of my mind. I guess my next step is to practice narrating my story and practice roleplaying my non-playable characters (NPCs) to be as fluent as possible as a DM when the game begins. Or just wing it when it comes.
These were the steps I took to create my campaign:
Step 1: Writing down my story in points
Step 2: Decide the mode of gameplay
Step 3: Pin down the maps and key characters for the campaign
Step 4: Creating the artworks using gen A.I and Map generators
Step 5: Naming my key characters
Step 6: Tinker with the enemy token mechanics of Roll20
Step 7: Create custom characters like my custom boss for the dungeon and the Maiden NPC
Step 8: Type out the GM notes for my story, enemy drops and dungeon loot
Step 9: Explore the Jukebox in Roll20 to add music
Step 10: Practice Reveal Mask, FX and Measure Tool to create an immersive experience for Players
I hope my experience will aid you in creating your first campaign on Roll20’s VTT too.